Quick Navigation
Your Apple ID marks who you are when using iOS devices. You need an Apple ID for all Apple services, including iTunes, App Store, Apple Music, iCloud service, etc. Important as it is, there may be situations where you want or need to switch to a different Apple ID. Maybe you need to buy an app that is only available in another country. Or because you bought a used iOS device and the previous owner forgot to sign out of their account. Of course, if you sell your old iPad, you should also remember to sign out before giving it to the buyer.
Whatever the reason, you need to know how to change your Apple ID, and this post is going to give you a detailed guide. Scroll down and find the solutions!
Part 1. Change Apple ID on iPhone (Step-by-Step)
Before changing to another Apple ID, you need to sign out first. You can sign out the existing Apple ID via Settings. Do as follows:
Step 1. Go to Settings(the Gear icon) on your iPhone
Step 2. On top of the Settings page, you can find your account profile with your name which says Apple ID, iCloud, iTunes & App Store. Tap it.
Step 3. Scroll down and find the red Sign Out button. Press it.
Step 4. Fill in your Apple account password.
Step 5. Choose whether you want to keep the data. If so, your data will be backed up on iCloud.
Step 6. Confirm Sign Out again and remove the Apple ID.
After you successfully sign out of the previous Apple ID, you can change your Apple ID and log in with a new one:
Step 1. Go to the Settings(the Gear icon) page.
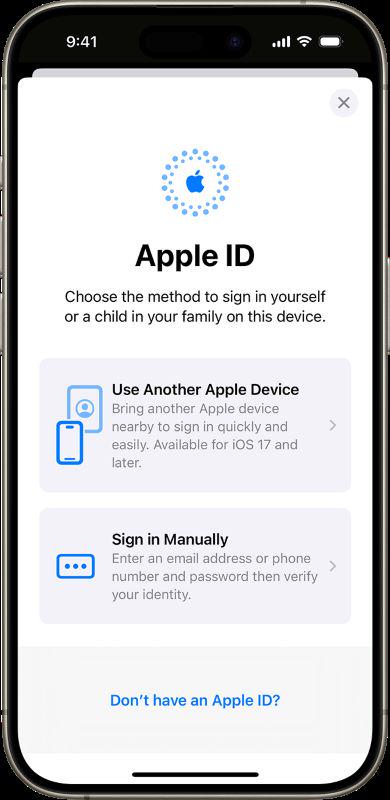
Step 2. Tap Sign in to your iPhone.
Step 3. Select a proper way to sign in. You can choose from Use Another Apple Device or Sign in Manually.
Part 2. Change Apple ID Associated Email Address on iPhone
You can log in to your Apple ID with an associated email address. Once you no longer use this email address, you must change your Apple ID-associated email address to the new one. It would not affect your data and purchases on the device, just follow the instructions below.
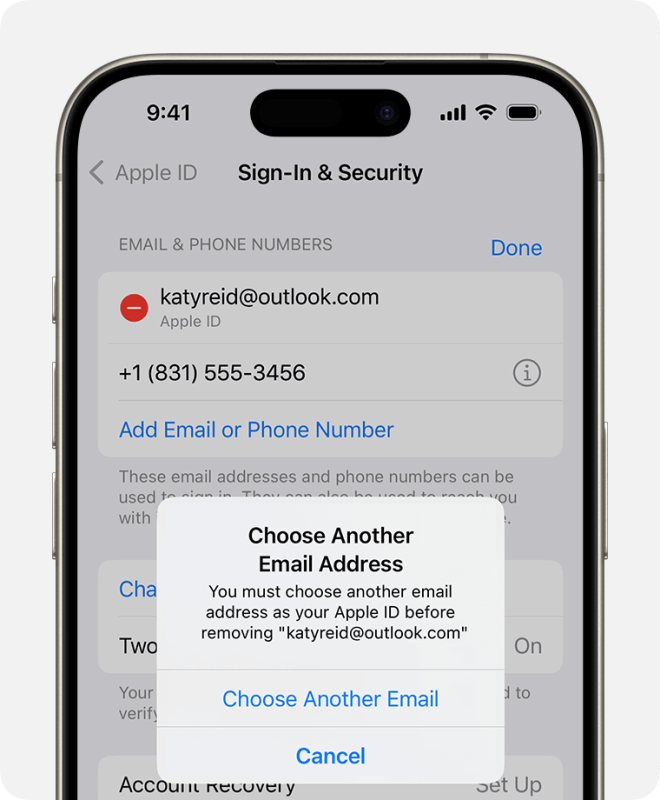
Step 1. Go to Settings>Your Apple Account>Sign In & Security.
Step 2. Tap the Edit button next to Email & Phone Numbers
Step 3. Tap the red Remove button next to your existing email address and choose Delete.
Step 4. From the pop-up Choose Another Email Address page, tap Choose Another Email Address. You may need to enter your Apple ID password then.
Step 5. Fill in your new email address and tap Continue.
Step 6. A verification code will be sent to your new email address. Enter the given code to confirm your new email address.
- You would better change your Apple ID email address on a trusted iOS device.
- You can not change the email address to one that is already associated with another Apple ID. Check before you change your Apple ID-associated email address.
Part 3. How to Change Apple ID on iPhone without Password
You may have noticed that when you change to a new Apple ID, you have to enter your Apple ID password. But how to change the Apple ID if you forget the password? And if you buy a used iPhone with its previous owner's Apple ID signed in, how to get rid of someone else's Apple ID on your iPhone? Not to worry! We can provide you with solutions as well.
Whether you forgot the password or don't have the password for your used iPad, you can use Passvers iPhone Unlocker to remove the previous Apple ID smoothly without knowing the password. And then you are free to sign in with your new Apple ID! The Passvers iPhone Unlocker features:
- Easily change your Apple ID by removing the previous one, without knowing the password.
- Help you gain full control of your iPhone with no restrictions.
- User-friendly interface, safe and easy-to-use operations.
- High compatibility. It works with both Windows PC and Mac and supports multiple device models from iPhone 4 to the latest iPhone 16.
The ultimate Passvers iPhone Unlocker not only helps you to remove Apple ID from your iPhone. It can unlock the following 6 types of iOS locks, including iOS screen passcode, iCloud Activation Lock, Mobile Device Management, iPhone/iPad screen time passcode, and iTunes Backup Password.
How to Change Apple ID on iPhone without Password via Passvers iPhone Unlocker
The best thing is, that Passvers iPhone Unlocker is reliable, professional, and at the same time easy to use. You can finish the removal process with simple steps. Do as follows:
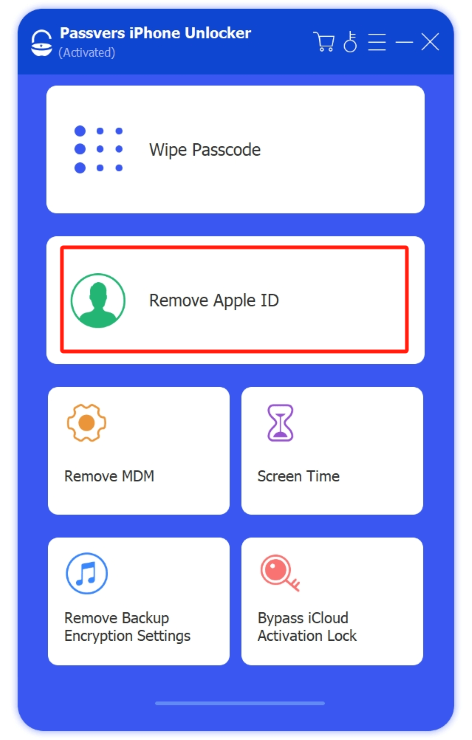
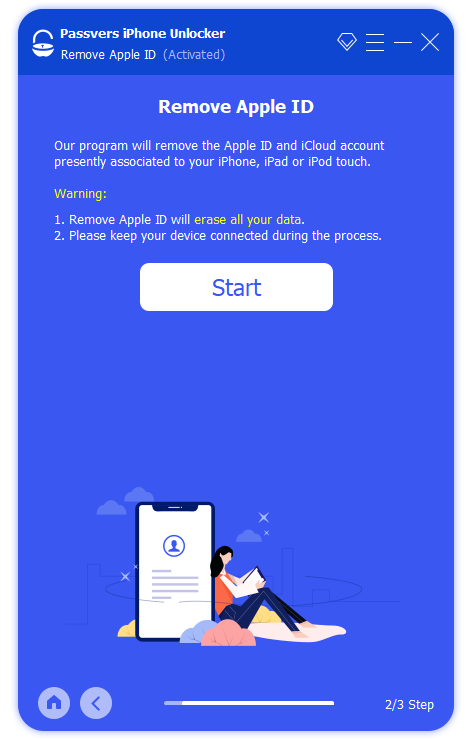
Step 1. Launch Passvers iPhone Unlocker and choose Remove Apple ID.
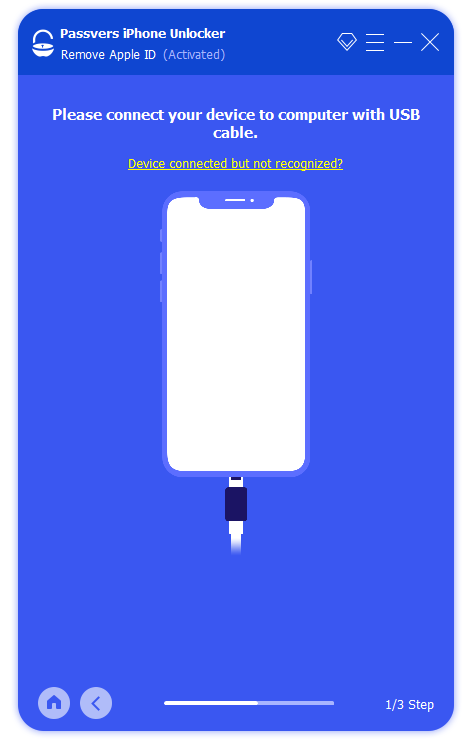
Step 2. Press Start after successfully connecting your iPhone to the computer.
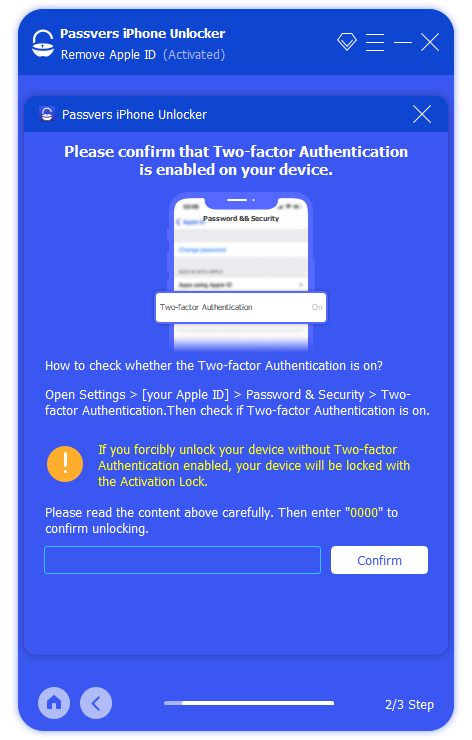
Step 3. Make sure that the Two-factor Authentication on your device is On. Fill in 0000 and press Confirm.
You can check the status via Settings>[Your Apple ID]>Password & Security>Two-factor Authentication.
Step 4. Confirm your device information and press Start.
Step 5. On the pop-up Unlock Confirmation screen, enter 0000 and choose Unlock to continue.

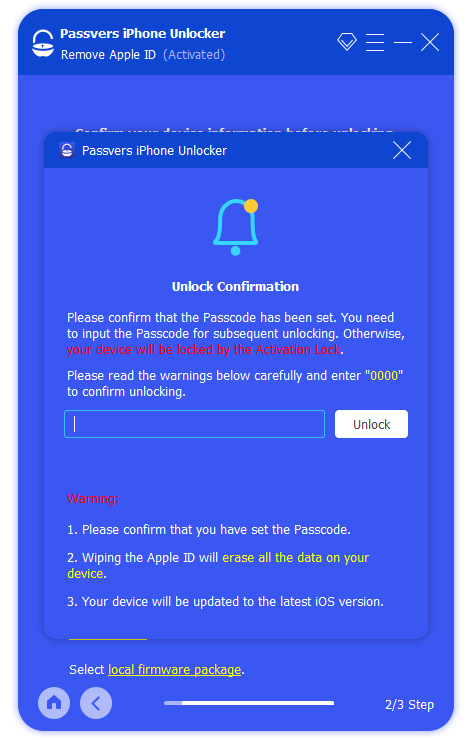
Step 6. Again confirm your device information, and then press Start.
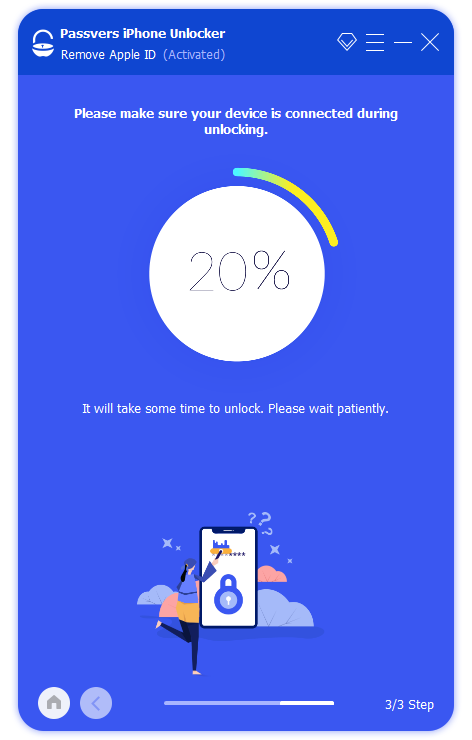
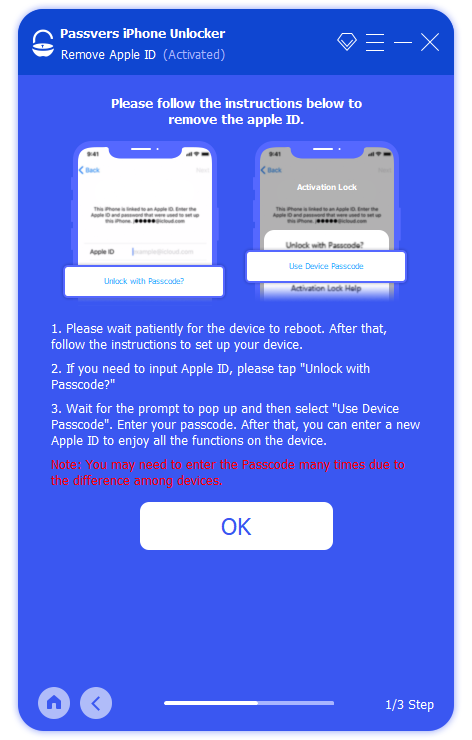
Step 7. The removal process begins. Wait until it is finished, and follow the onscreen instructions to remove your Apple ID.
- For devices with iOS 11.4 and later versions, you must set up Two-factor Authentication as well as an iPhone screen passcode to remove the Apple ID. Make sure that you remember the correct iPhone screen passcode! And all data will be erased after you remove the Apple ID.
- Your device will be updated to the latest iOS version after the removal.
FAQs of How to Change Apple ID on iPhone
Q: How to Create a New Apple ID on iPhone or iPad
A: You can create an Apple ID when you set up your device or use the App Store on your iPhone/iPad. You can choose to Create a Free Apple ID when you first set up your device. But if you change your Apple ID and need to create a new one, after you sign out of the previous Apple ID, open the App Store, and press the My Account button. Then you will find a Create New Apple ID option. Follow the onscreen instructions to fill in your email address and password. Then you can use this email address as your new Apple ID.
Q: Can I not use an email address as my Apple ID?
A: Yes, you can use a mobile phone number as your Apple ID. And you can change your Apple ID from an email address to a phone number or vice versa.
Tips: If you stil can't change the Apple ID, you can try to remove it. Check the video tutorial below for the guide.
Final Words
If you want to change your Apple ID or need to change the email address associated with your Apple ID, the easiest way is to follow Apple's advice: go to the Settings app and tap the Existing Apple ID Account page to complete the change.
But if you forget the Apple ID password or want to get rid of someone else's Apple ID on your iPhone, make use of the powerful Passvers iPhone Unlocker. It can easily remove the logged in Apple ID without knowing the password, and then you are free to change Apple ID as you need.