Quick Navigation
After a long wait, iOS 18 finally made its debut. This update introduces several new features that enhance both functionality and user experience. With this version, you can personalize your Home Screen in new ways by placing app icons and widgets to create the ideal layout on your screen. Also, it offers a big redesign of Photos so you can easily find and relive the special moments of your life. However, it is noted that this upgrade may not completely resolve the bugs or glitches in the iOS 18 beta version.
You may find some apps fail to update or the increased storage of the iOS 18 profile drags down the running speed of your iPhone. The various negative experiences may lead you to downgrade from iOS 18. So in this article, you will be guided through 2 different methods (with or without iTunes) to downgrade from 18 without losing any important data. Keep reading to learn more details.
1. Before Downgrading: Back up Your Data on iPhone
Before downgrading your iPhone system back to a former iOS version such as iOS 15 or iOS 16 from iOS 18, the first preparation you need to do is to back up your device data. This is a big warning because some iOS downgrading methods would wipe all your device data and bring the whole iPhone back to factory condition completely. If you select to return to the iOS version at which you have saved an archived backup before, then you can restore the data after downgrading from iOS 18. If not, then your file data will all be lost.
Where to Get and Download iOS 18
Manually upgrade to iOS 18
There are several ways that people can get and download iOS 18 to their iPhones. The simplest way should be to go to "Settings" on iPhone, and scroll down to "General" to check the "Software Update". When your iPhone detects the latest release of iOS 18, simply press "Download and Install" and you can install the latest iOS 18 system on your iPhone.
Upgrade to iOS 18 with a computer
Except for the method mentioned way, by connecting your iPhone to a computer and using iTunes, you can also upgrade to iOS 18 on your computer.
Here are the simple steps.
Step 1. You can download the latest version of iTunes and connect your iPhone to it.
Step 2. You need to find the iPhone icon and click "Check for Update" to find the iOS 18 update.
Step 3. You need to click "Download and Update" to install iOS 18 for your phone.
Common Problems After Upgrading to iOS 18
Each iOS update may come with some system bugs, which really spoils the experience and interest of people who prefer trying a new system upgrade. Therefore, it is also reasonable that you want to downgrade the iOS system to the previous versions. But what may go wrong with this iOS 18 update? Perhaps you should know these potential problems before you upgrade to iOS 18.
- Quick Battery Drain
- iPhone Heat Up
- Annoying Copy and Paste Prompt
- Slow Spotlight Search
- Unlock iPhone with Apple Watch Feature Not Working
- App Crashing Issue
- Wi-Fi Not Working
- Personal Hotspot Not Working
- Touchscreen Unresponsiveness
How to Back Up Data on iPhone
No matter if you've decided to download and install the iOS 18 updates or you want to roll back to iOS 16 or previous versions, just don't forget to back up your iPhone first. As what's been mentioned before, some iOS downgrading methods can wipe all your device data and bring the whole iPhone back to factory condition. And if you don't want to lose any important data, you can follow these official steps to back up iPhone data with iTunes.
- Go to Settings > [your name] > iCloud > iCloud Backup.
- Turn on iCloud Backup. If you have turned on iCloud, it will automatically back up your daily data.
- To perform a manual backup, tap Back Up Now.
To view your iCloud backups, go to Settings > [your name] > iCloud > Manage Storage > Backups. To delete a backup, choose a backup from the list, then tap Delete Backup.
Is It Possible to Downgrade iOS Without a Computer?
In order to downgrade the iOS system of your iPhone, you have to connect the device to a PC or Mac for operating from the computer side. That means you have to use a computer to downgrade your iPhone system. The main reason is that you need the help of third-party software such as iTunes or other system recovery tools. As a result, the computer is necessary when you need to downgrade the iOS system.
2. How to Downgrade iOS without iTunes (The Easiest Method)
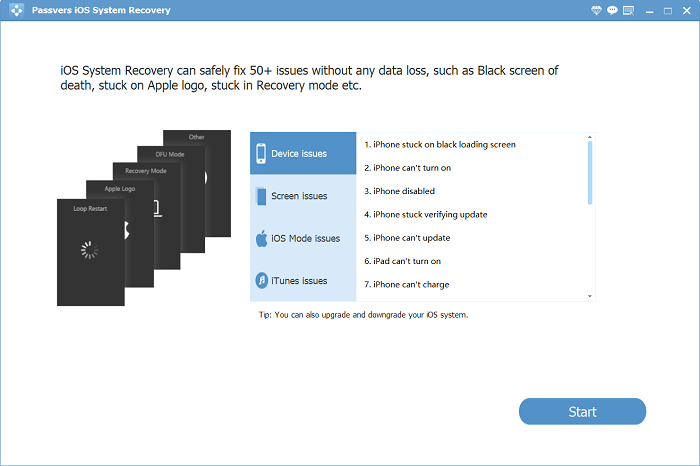
The most helpful and reliable software to help downgrade iOS without using iTunes is Passvers iOS System Recovery. This software can be installed on Windows and Mac computers with a very easy setup process. There are several situations where you can ask Passvers iOS System Recovery to help:
- Downgrade the iOS system to the former version
- Fail to reboot/update/re-open your iPhone
- Get stuck while using the iOS system, such as recovering the phone or in DFU mode
- Meet some iTunes errors during the backup/update/syncing process
Under such situations, Passvers iOS System Recovery can help people fix it by providing the following amazing features:
- Offers a safe way to repair iPhone system problems without data loss
- Offers very simple UI and easy-to-use functions
- Supports the latest iOS 18 and iPhone 16 model
- Be able to fix over 50 iOS stuck scenarios with easy clicks
- Works stably on both Windows and Mac computers
Here's how to downgrade from iOS with the reliable Passvers iOS System Recovery.
Step 1. Install Passvers iOS System Recovery
Before starting the downgrade process, you need to install Passvers iOS System Recovery on your Windows or Mac computer. The installation process would be very simple and you only need to follow the instructions to go.
Step 2. Open Passvers iOS System Recovery and Start Free Trial
When Passvers iOS System Recovery is installed and you open the software, a window will show up asking you to register it. You can start using the function by clicking the "Start" button.

Step 3. Connect iPhone with the Software
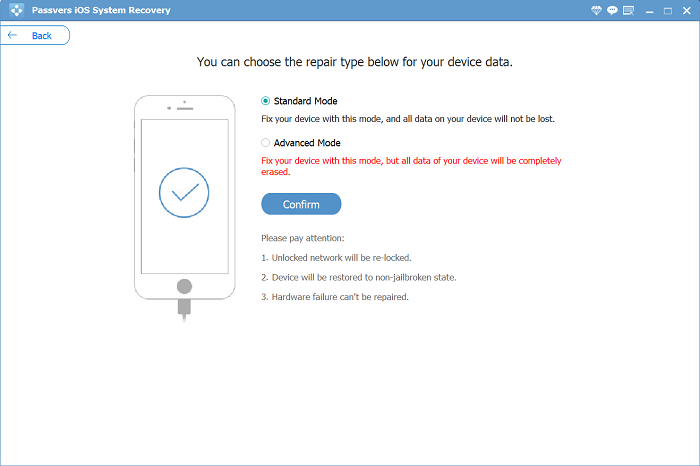
Now, connect your iPhone to the computer and Passvers iOS System Recovery will detect it for building the connection. You just need to press the "Start" button and select the "Standard Mode".

Tips:
Before starting to downgrade from iOS 18, you need to make sure of the following things by using Passvers iOS System Recovery:
- If your iPhone has been jailbroken, the downgrade will turn it back to the original non-jailbroken one.
- If you have unlocked the iPhone, it will be turned back to the locked status.
Step 4. Downgrade iOS 18
Simply click the "Optimize" button and select a firmware iOS version such as iOS 16 or 15 for downgrading the current iOS 18 system. Simply click the "Download" button to save the firmware and click "Next". Then Passvers iOS System Recovery will bring your iPhone back to iOS 16 or 15 again.
3. How to Downgrade from iOS 18 with iTunes
iTunes offers a way to downgrade the iOS system from iOS 18 to an earlier version. It would be a bit more complex using iTunes because the official doesn't provide the firmware of the iOS former system version. So you have to search on the Internet for the iOS system version you want to downgrade to ahead of all. When you have downloaded the firmware, you can start downgrading from iOS 18 using iTunes. Here is how.
Step 1. Open iTunes on your computer, and also connect your iPhone to let iTunes connect to it.
Step 2. Turn on the DFU mode on your iOS 18 iPhone. Once you turn it on, iTunes will notify you to restore the iPhone. You should click the "OK" button.
Step 3. Directly click the "Restore iPhone" button in iTunes and choose the iOS firmware file you just downloaded for downgrading by pressing the "Restore" button.
Step 4. After choosing the firmware file and clicking "Next" to continue the process, your iPhone can be downgraded from iOS directly.
4. If You Fail to Upgrade Your iPhone, How to Fix?
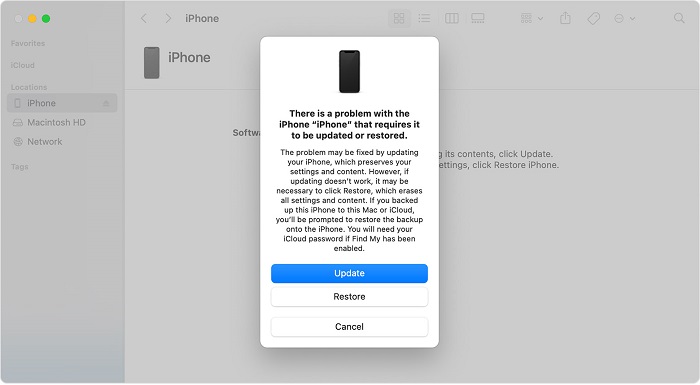
If you have problems upgrading or downgrading your iPhone, here is an official way offered by Apple to help. You only need to put your device back in "Recovery Mode" and set it up again. The steps are introduced here.
Step 1. Make sure your Mac or iTunes has been updated to the latest version. Then you need to connect your iPhone to your computer.
Step 2. Enter the recovery mode after the connection. You need to find the correct way to open recovery mode because it will be different for different iPhone models.
For iPhone XR or later:
- Press and release the volume up button at a quick speed.
- Quickly press and release the volume down button.
- Then, press and keep holding the side button, then the recovery mode will be opened.
Step 3. Locate the iPhone device on your computer now, now a notification will show up. You should press the "Update" button.

Step 4. Finally, when the iPhone is updated, you can set it up again.
Conclusion
To downgrade from iOS 18, you can choose the method according to your needs. It would be more convenient to use Passvers iOS System Recovery because you don't have to search for the firmware again. You can directly download the software for free and try it to downgrade from iOS 18 now.