Quick Navigation
Tips for Picking A Method:
If your iPhone is disabled and requires your to connect to iTunes, you can click here for detailed guide immediately. If you find iTunes doesn't work, try a third-party professional tool to unlock it at once. Click here for a full guide.
After repeatedly entering incorrect passcodes to unlock your iPhone, you might see a message on your iPhone lock screen asking you to try again in several minutes. Or it may say "iPhone is disabled, connect to iTunes." Wondering why your iPhone is in such a situation and how to fix it? Explore the 6 solutions below to regain access to your disabled iPhone.
What Does "iPhone is Disabled" Mean?
When your iPhone displays the message "iPhone is disabled," it means your iPhone has temporarily locked out for wrong entries. The time estimate (e.g., "Try again in 1/5/15/60 minutes") shows how long you have to wait before you can attempt to unlock your iPhone again. If it asks you to connect to iTunes, it means you've reached the maximum of wrong entries. You may need to follow the guide below to regain access to your iPhone.
Enter with the Old Passcode if You've Changed Passcode Recently
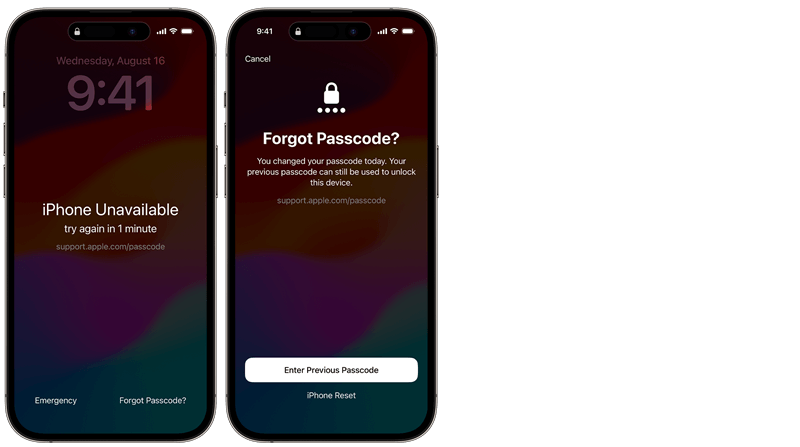
For iOS 17 or newer devices, there's a "Passcode Reset" feature. After you change the screen passcode, your old passcode will be kept for 72 hours. You can temporarily use the old passcode to enter your iPhone. And you should immediately set another new passcode if you use this feature. Steps as follows:
-
- Tap "Forget Passcode?" on the "iPhone is disabled" screen.
- Tap "Enter Previous Passcode".
- Enter your old passcode. Follow the instructions to set a new passcode and enter your disabled iPhone with it.
📌 Note:
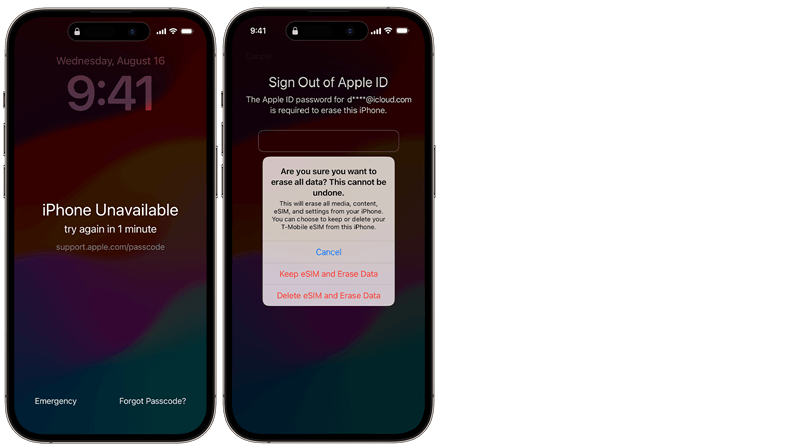
The following methods will erase your iPhone. If you are using an eSIM, you can choose to keep the eSIM on this iPhone or remove it. If you choose to remove it, you will need to contact your carrier to get a QR code to reconfigure this eSIM number later.
Erase Disabled iPhone Directly on Lock Screen
For iPhone running iOS 15.2 or 16, you can directly erase it when it is disabled. As you erase it, the passcode will be removed. But this requires your disabled iPhone to be connected to the internet and you should enter your Apple ID password to sign out while unlocking it.
- Keep trying to enter your locked iPhone until you see the "iPhone is disabled" screen.
- Then tap the "Forgot Passcode?" option.
- Tap "Start Reset" to confirm and enter password to sign out of your Apple ID.
- Wait for your disabled iPhone to be reset. When it starts again, set a new passcode. And you can choose to set it as a new iPhone or restore an iTunes/iCloud backup you've made before.
Unlock Disabled iPhone with iTunes/Finder
When you see the "iPhone is disabled, connect to iTunes" message, it means you've reached the maximum number of wrong entries. You should follow the on-screen instructions to restore your iPhone with iTunes/Finder to get into it.
-
- Turn off the disabled iPhone.
- Launch the latest updated iTunes on your PC (Finder on Mac as well). Connect your iPhone to the computer with a USB cable.
- Hold down the appropriate button on your iPhone to put it into Recovery Mode:
- iPhone X or later, iPhone SE (2nd generation), iPhone 8, and iPhone 8 Plus: The Side button.
- iPhone 7 and iPhone 7 Plus: The Volume down button.
- iPhone SE (1st generation), and iPhone 6s and earlier: The Home button.
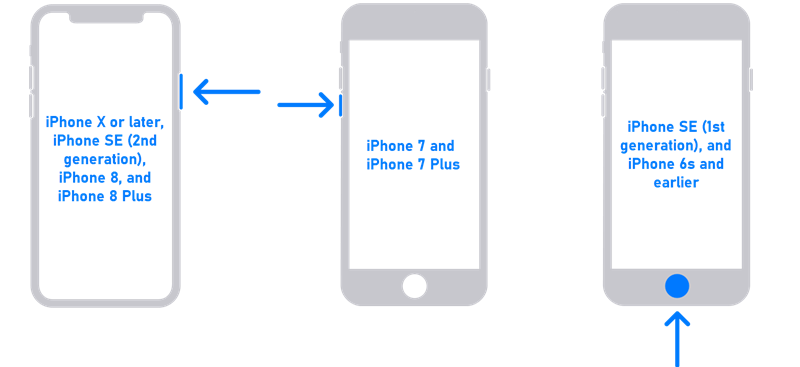
Keep holding the button until you see the restore screen.

- Locate your iPhone in iTunes/Finder, click Restore and wait for process to Finish. Then setup your iPhone again.
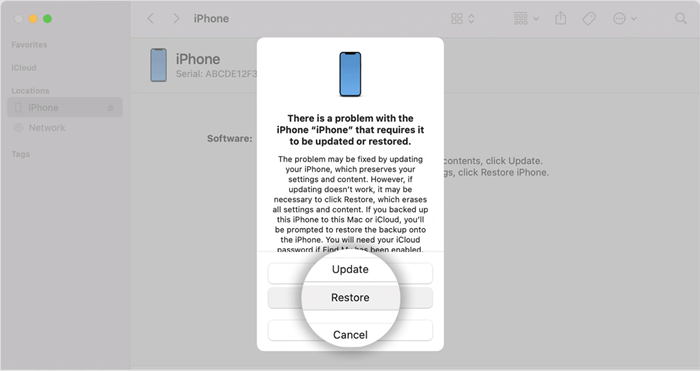
Note:
This method will also restore your iPhone and update it to the latest iOS version. If you have backed up the iPhone before it is disabled, you can restore the backup to get back your data.
Access Disabled iPhone with an Unlocking Tool [Easy & Fast]
As we know, iTunes doesn't always work. If you wish to unlock your disabled iPhone without iTunes, the second recommended method is to use an iPhone unlocking tool. The advantage is that you can avoid unclear processes and the annoying iTunes errors.
Passvers iPhone Unlocker is an iOS unlocking tool suitable for those who encounter the "iPhone is disabled" problem. It can help you unlock iPhone without passcode within a few clicks, regardless of the digit passcode, Touch ID, or Face ID. Whether you use an old iPhone running iOS 8 or the latest iPhone 16 running iOS 18, Passvers is able to recover the "disabled" iPhone back to a normal one.
Here's a video tutorial to show you how to unlock iPhone without passcode. Follow the steps below to unlock your disabled iPhone on your own:
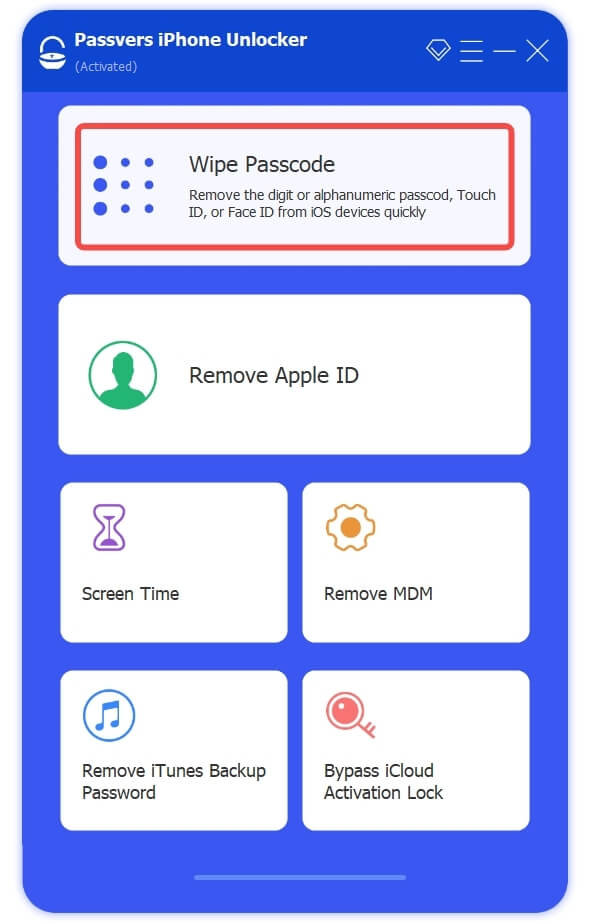
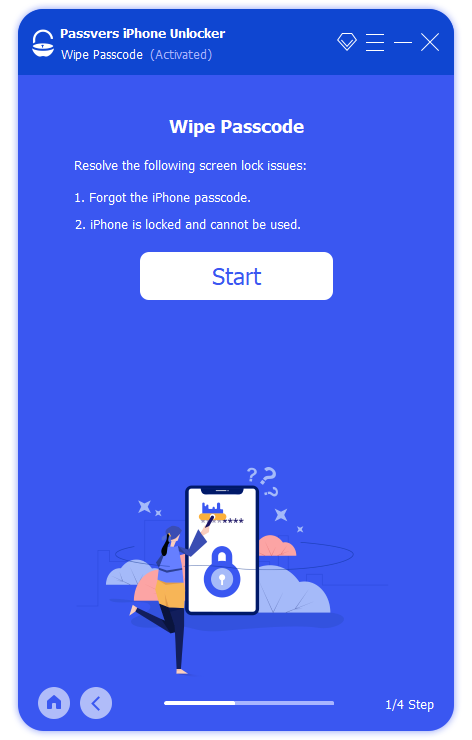
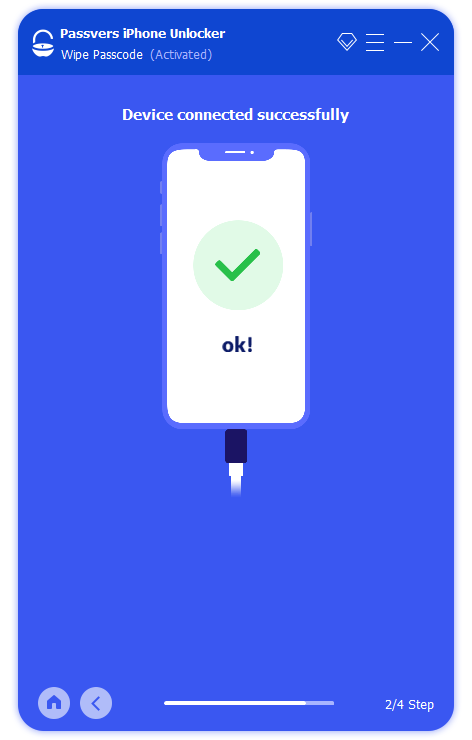
Step 1. Launch Passavers iPhone Unlocker on your computer, and select "Wipe Passcode Mode". Connect Your iPhone.
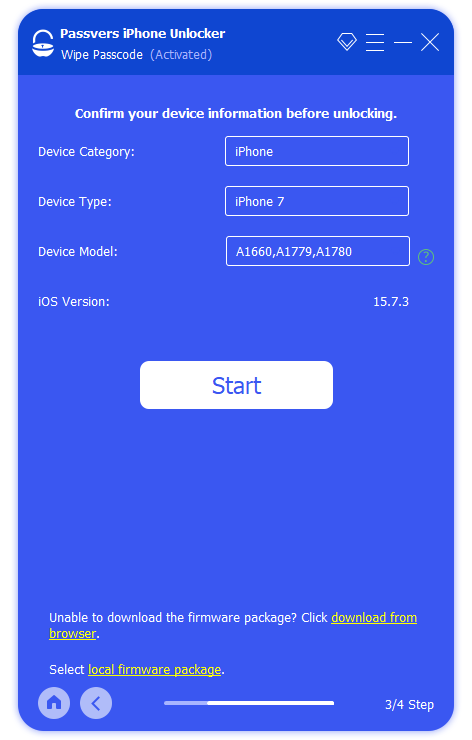
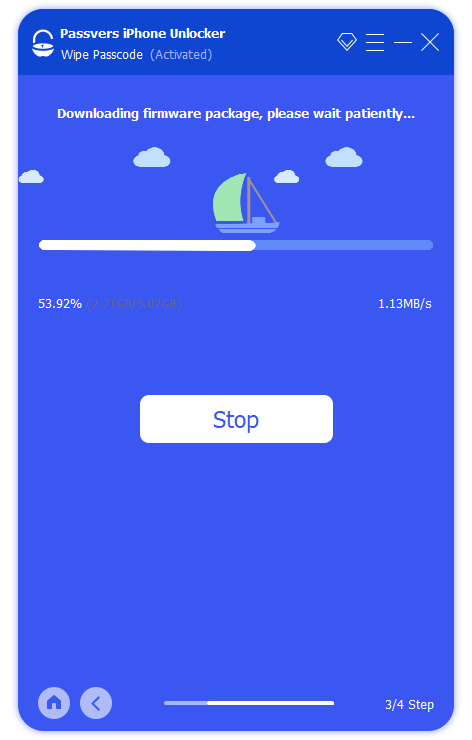
Step 2. Check the onscreen information of your iPhone, download the firmware package.
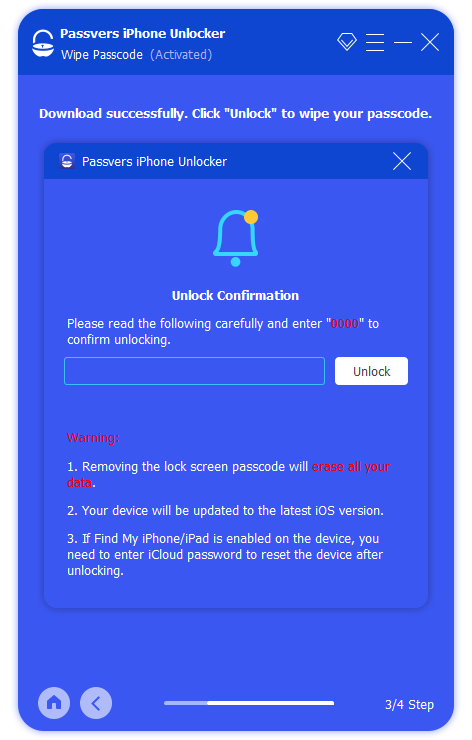
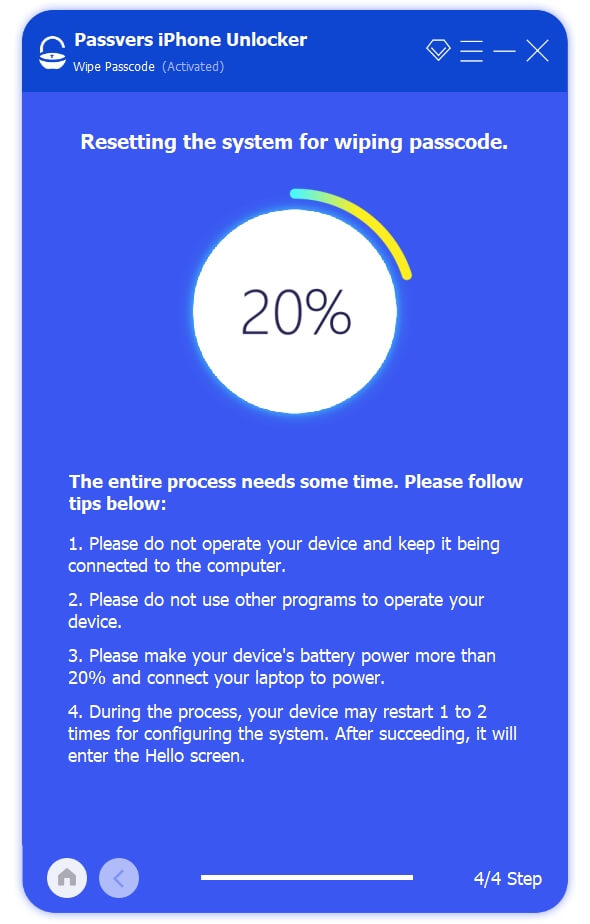
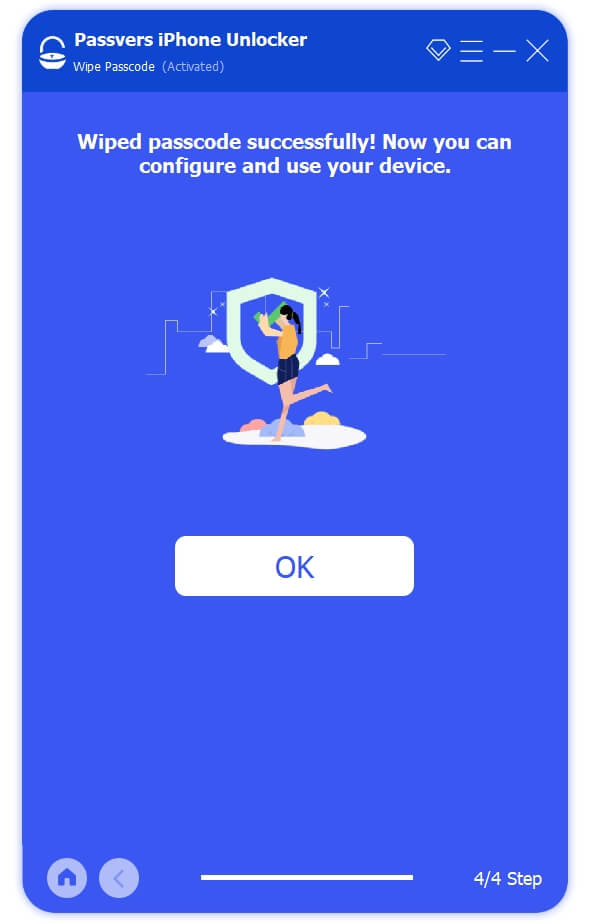
Step 3. Enter "0000" on the popup page to confirm unlocking your iPhone. After a while, the "iPhone is disabled" message will be removed.
NOTE:
- Passcode removal will erase all data on the disabled iPhone and update it to the latest iOS version.
- If "Find My" has been turned on, you need to sign in to your Apple ID to reset your device after unlocking the passcode.
Unlock “iPhone Is Disabled” Using iCloud without Computer
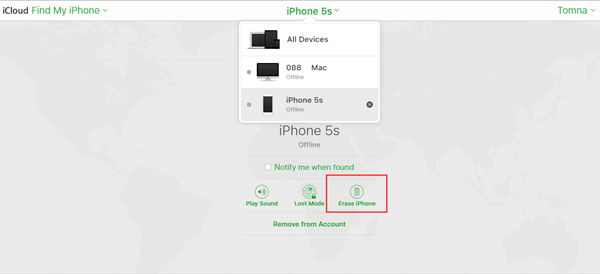
If you have "Find My iPhone" enabled before your iPhone is disabled, you can visit iCloud.com or use the Find My app to "Remote Wipe" the disabled iPhone. When your iPhone is wiped, the screen lock will also disappear. This method enables you to unlock disabled iPhone without iTunes/computer, but requiring stable Internet access to your device.
Reset a Disabled iPhone with iCloud
- Visit iCloud.com, log in with the same Apple ID on your disabled iPhone.
- Click "Find My iPhone", then "All Devices". Then, carefully select the disabled iPhone.
- Click "Erase iPhone" to remotely wipe the device and its password.
Unlock a Disabled iPhone with Find My App
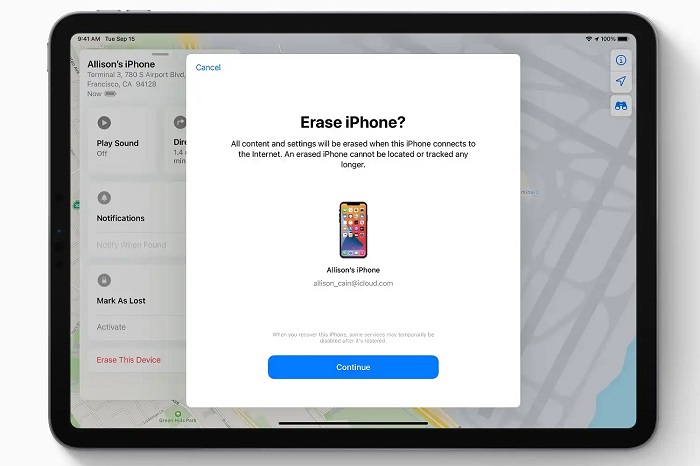
- Open the "Find My" app on your iPad/Mac/another iPhone. Tap/click the Devices tab.
- Select the name of the disabled iPhone and tap "Erase This Device".
- Hit "Continue" to proceed with data erase. Then enter your Apple ID password, then tap Erase again.
NOTE:
The Find My feature can fix "iPhone is disabled, connect to iTunes" without computer but requiring your Apple ID password. If you don't remember the Apple ID psaaword of your disabled iPhone, Passvers iPhone Unlocker is highly recommended.
Fix Disabled iPhone with iOS System Repair Tool
To enter a disabled iPhone, you can also consider using Passvers iOS System Recovery. It's a reliable iOS repair tool for addressing iOS issues, and can swiftly unlock disabled iPhone with the simple steps below.
-
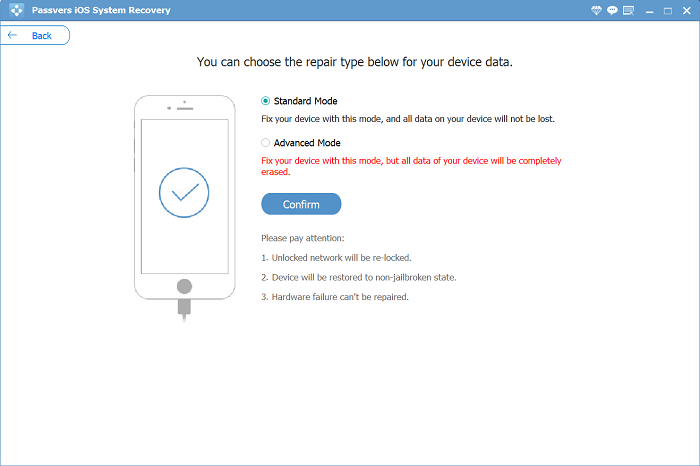
- Launch Passvers iOS System Recovery on your computer. Connect the disabled iPhone to your computer.
- Click "Advanced mode" to fix the disabled iPhone.
-
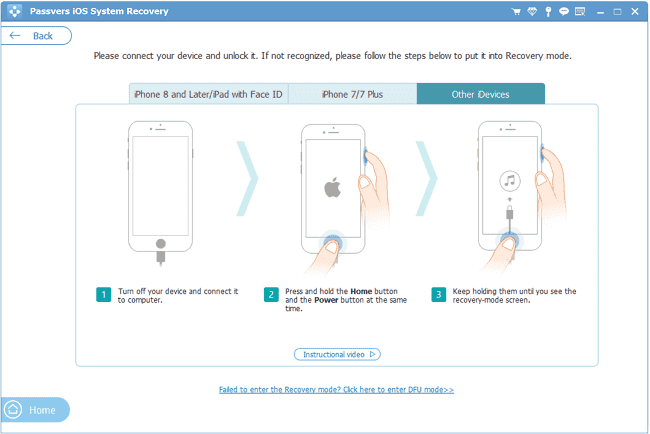
- Put your iPhone into recovery mode. After that, check your device information in the program.
-
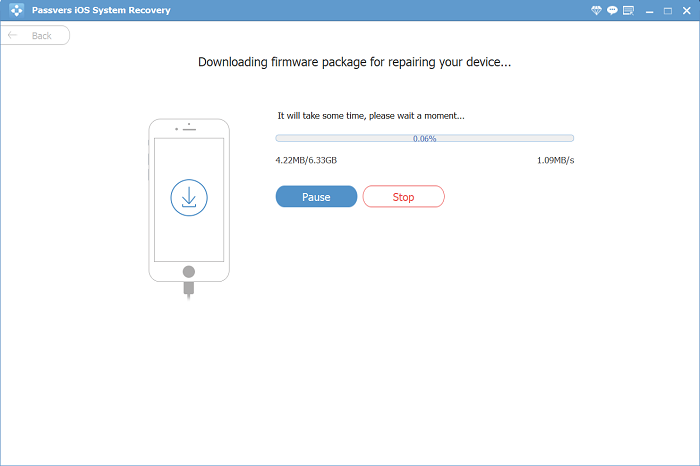
- Click on the "Fix" button. The screen will display the repair process. As "Repair completed" comes, the "iPhone is disabled, connect to iTunes" message disappears.
Tips:
- Using this method to fix "iPhone is disabled" will erase all the data.
- If your device is set with an activation lock, this guide can not deal with this, but you could refer to How to Bypass iCloud Activation Lock.
All Methods: Which is Suitable to Fix "iPhone is Disabled"
To help you decide which one is the best method to fix "iPhone is disabled, connect to iTunes", here comes a comparison chart. Check it right now.
| Passvers iPhone Unlocker | Old Passcode (iOS 17/18) | Erase iPhone (iOS 15.2-16) | iTunes | Find My | Passvers iOS System Recovery | |
|---|---|---|---|---|---|---|
| Success Rate | High | High | High | Medium | Medium | High |
| No Apple ID Required | ✅ (Unless Find My is on) |
✅ | ❌ | ❌ | ❌ | ✅ (Unless Activation Lock is on) |
| Difficulty Level | Easy | Easy | Easy | Medium | High | Medium |
| Process Speed | Fast | Fast | Medium | Medium | Slooooooow | Fast |
iPhone is Enabled!
Now you've learned all the methods to fix "iPhone is disabled, connect to iTunes". The methods by Apple official can give a uniform solution and one third-party tool can lead you to a shortcut to fix your disabled iPhone. If you want an easy and fast way to get into the disabled iPhone, Passvers iPhone Unlocker is worth trying. Give it a shot, and you can easily unlock your disabled iPhone!
FAQs About the "iPhone is Disabled, Connect to iTunes" Error
How long can an iPhone be disabled?
iPhone is disabled for X minutes:
If you enter 6 incorrect passcodes in a row, the iPhone will be disabled for 1 minute. For 7 incorrect entries, 5 minutes; 8 times, 15 minutes; 60 minutes; accordingly. If you know the right passcode, just wait for the corresponding duration and enter the right passcode.
iPhone is disabled for X million minutes:
Exaggerated numbers often show up due to a broken screen or jailbreak. In that case, the iPhone's internal clock resets to midnight of January 1, 1970, causing the "iPhone is disabled" for millions of minutes. Inserting a new working SIM card can usually fix it.
How do you unlock a disabled iPhone that won't connect to iTunes?
Generally speaking, there are two ways to fix "iPhone is disabled" without iTunes - an inbuilt function for iOS and the Find My feature.
- With iOS 15.2 or 16, you can directly choose the "Erase iPhone" option in the bottom corner after entering the wrong passcode 7 times.
- If you know exactly your Apple ID and password, iCloud Find My is the second good solution you can try.
But if the two methods cannot fix your disabled iPhone to normal working status, Passvers iPhone Unlocker can become your competent assistant. Its stable operation and powerful function can help you unlock a 4/6-digit passcode easily.
