Quick Navigation
iOS undergoes periodic updates to address bugs and introduce new features. The latest released iOS 17 includes several intriguing enhancements. However, during the process of upgrading from an older iOS version to iOS 17, you might encounter a frustrating situation where your iPhone continuously displays "Update Requested" and fails to proceed with the update.
Rest assured, this issue can be easily resolved. In this article, we will explore 6 straightforward and efficient fixes to the "iPhone update requested" problem, ensuring a smooth update experience for you.
What Does Update Requested Mean?
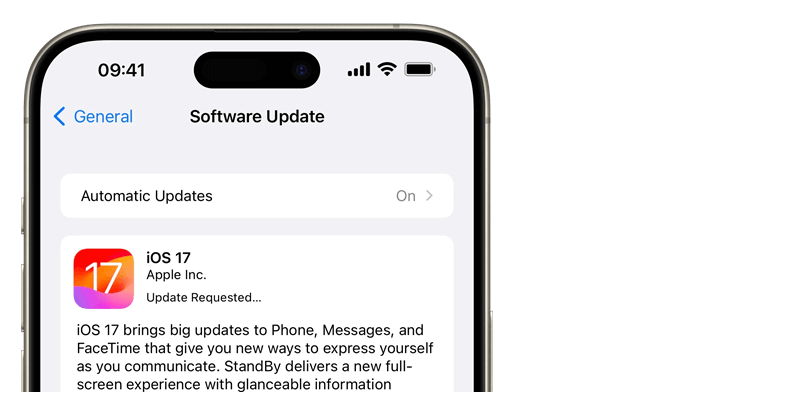
iPhone says update requested typically indicates that your iPhone has successfully communicated with Apple's servers and is in the queue to download and install the pending update. During this phase, your device is waiting for its turn to access the update files.
Reasons for iPhone Stuck on Update Requested
Generally, "Update Requested" might linger for a while, especially during peak times when many users are trying to update simultaneously. If the message persists for an extended period without progress, it could be due to network congestion, server overload, or other technical issues. In such cases, you may try to fix it by yourself to ensure a successful update.
Solution 1. Check or Reset the Network Connection
An unstable network connection may lead to your iPhone stuck on Update Requested. Check your network or connect to another one can fix this.
If you are connected to Wi-Fi, you may either:
- Change to another available Wi-Fi.
- Disconnect the Wi-Fi and use your cellular data. (Make sure you have enough data plan.)
If you use cellular data, you can try to:
- Turn on and off the Airplane mode.
- Connect to a Wi-Fi network.
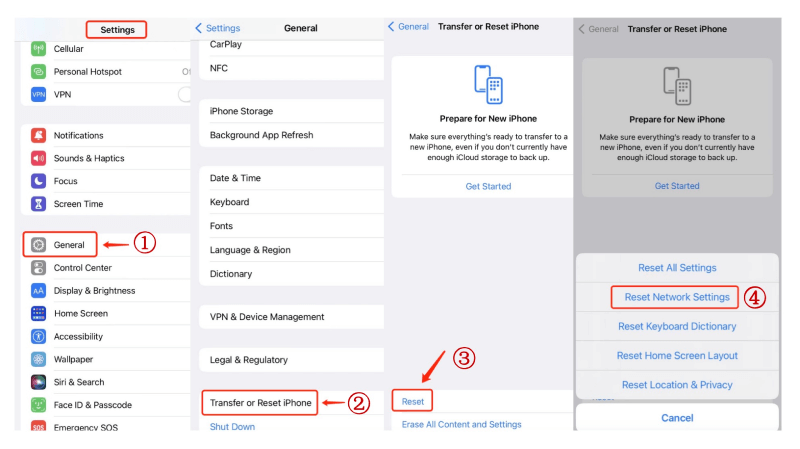
If the above methods don't work, you can reset the network settings and try again. Follow the steps below:
- Open the "Setting" > "General".
- Tap "Transfer or Reset iPhone/iPad" > "Reset" > "Reset Network Settings".
- Connect to an available Wi-Fi or just use your cellular data to download the new iOS.
💡 Note:
This action will only reset your network settings, it will not erase any other content on your iPhone. However, all previously connected Wi-Fi networks will be forgotten.
Solution 2. Delete the Update File and Redownload It
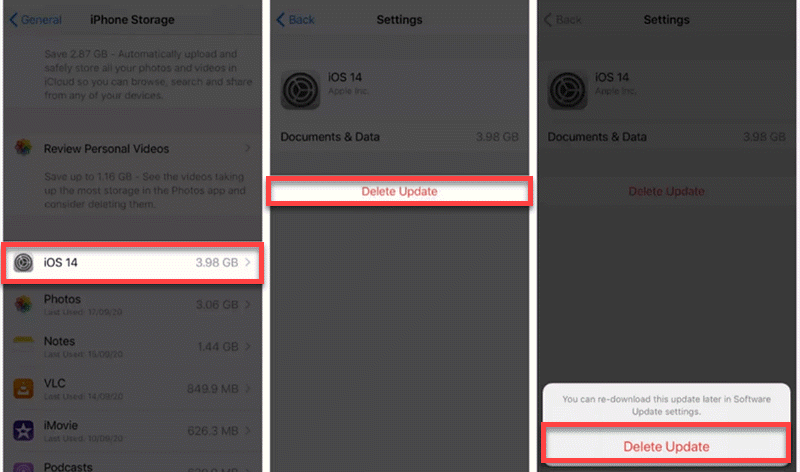
Sometimes the new iOS has been downloaded on your iPhone but cannot be successfully installed. This will also result in the iPhone stuck on Update Requested. In this case, you should delete the downloaded update file on your update requested iPhone and redownload it.
- Go to "Settings" on iPhone/iPad.
- Tap "General" and then "iPhone or iPad Storage".
- Select "iOS 17" with the settings icon and tap "Delete Update" twice.
- Go to "Settings" > "General" > "Software Update". Check and redownload the update.
Solution 3. Force Restart the iPhone
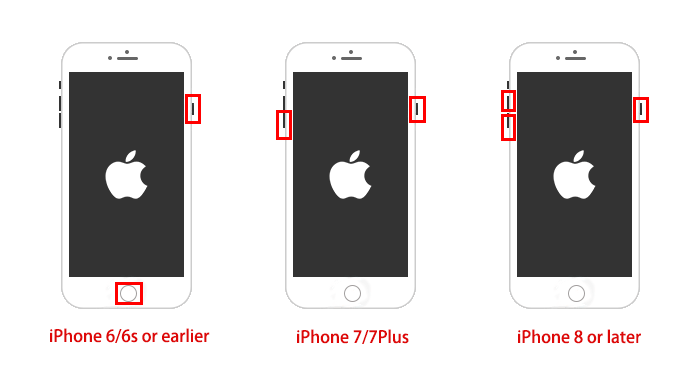
When your iPhone stuck on Update Requested, the easiest and fastest way is to reboot your iPhone. If your iPhone is even frozen and unresponsive, then try to force restart the iPhone. After the reboot, you'll be able to access your iPhone and upgrade it to the latest iOS version. Follow the instructions below according to your iPhone model.
- iPhone 8/SE 2nd/SE 3rd and models with Face ID: Press and quickly release the "Volume Up" button followed by "Volume Down". Then, press and hold the "Power" button until the Apple Logo shows up.
- iPhone 7: Press and hold both the "Volume Down" and "Power" buttons until the Apple Logo appears.
- iPhone 6s/SE 1st: Press and hold both the "Power" and "Home" buttons until the Apple Logo appears.
Solution 4. Free iPhone Storage
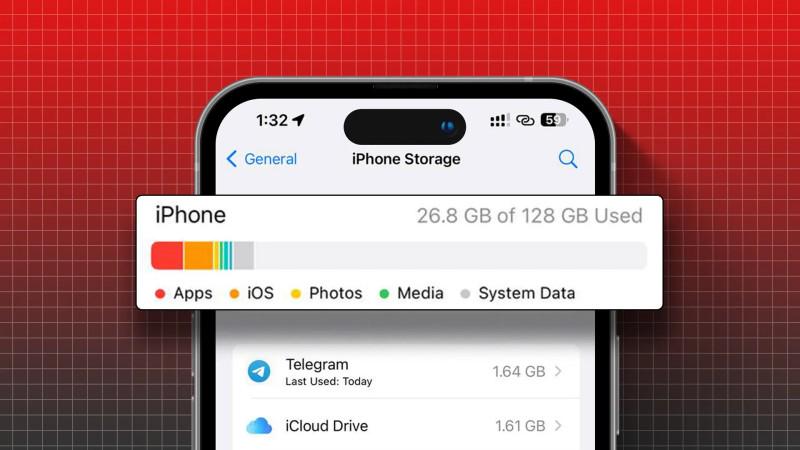
If your iPhone/iPad will not update after the update request, you should look up whether there is enough storage available for download and installation of the iOS update. Otherwise, the iPad/iPhone update requested issue may occur. To free up iPhone storage:
- Open the "Settings" app on iPhone/iPad.
- Tap "General" > "iPhone or iPad Storage".
- Choose unused apps and select "Offload App" or "Delete App".
After that, go back to "Software Update" to download the latest iOS update.
Solution 5. Update iPhone via iTunes/Finder
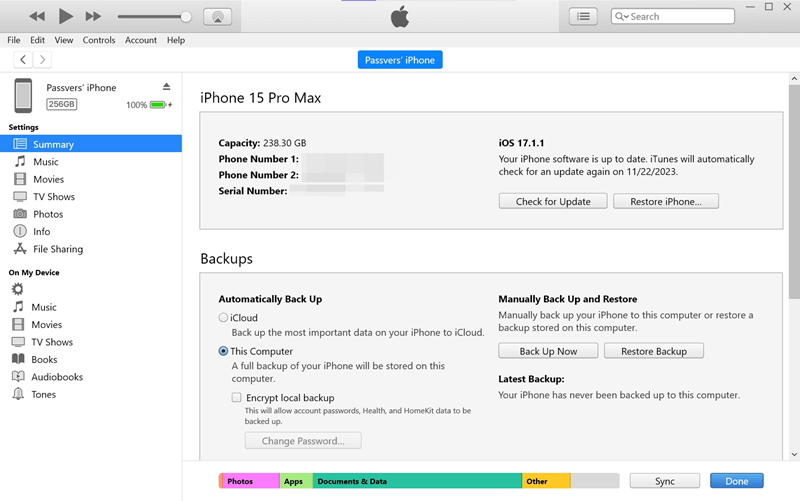
If your iPhone stuck on update requested during the update, you can use the Apple official tool iTunes/Finder to update your iPhone on Windows PC/Mac. Follow the steps below:
- Connect your iPhone to computer with a USB cable.
- Launch iTunes (Finder on Mac). Click the phone icon on the top left.
- Click Check for Update.
- If there's an available update, follow the onscreen instructions to update your iPhone.
Solution 6. Fix with iOS Repair Tool
If you've tried the above methods but your iPhone is still stuck on Update Requested, consider using Passvers iOS System Recovery. This tool is designed to be a user-friendlier alternative to iTunes.
When you encounter challenges during iOS updates, Passvers iOS System Recovery helps you easily update your iPhone by resolving common issues such as the persistent "Update Requested" problem for iOS 17 or other update-related glitches. Besides, you can also use this tool to resolve iPad update requested issues.
More Amazing Features to Discover
-
No Data Loss - Keep all iPhone data safe and sound, except for Advanced Mode.
-
All iOS/iPhone Supported - Compatible with iOS 17/16/15 and iPhone 15/14/13/12.
-
Ease of Use - Foolproof to fix iPhone stuck on update requested with onscreen instructions.
-
Privacy Security - Go through the whole procedure on your own without going to Genius Bar.
-
More Functions - Reset iPhone without password, downgrade iOS, unjailbreak iPhone, etc.
It requires no prior knowledge and takes only a few steps to repair the iPhone/iPad update requested stuck issue.
STEP 1. Download and install Passvers iOS System Recovery on your computer. Then, launch it.
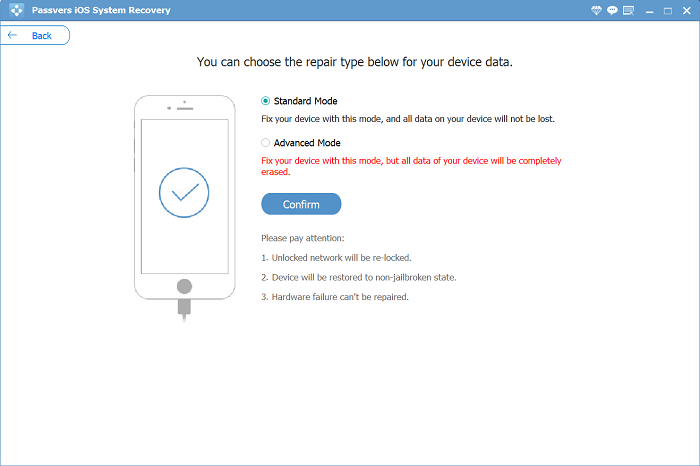
STEP 2. Connect your iPhone to the software and click "Start" to proceed. You can begin with the "Free Quick Fix" mode. If it fails, go with "Standard Mode" or "Advanced Mode".
STEP 3. Now, follow the instructions and put your iPhone into Recovery Mode.
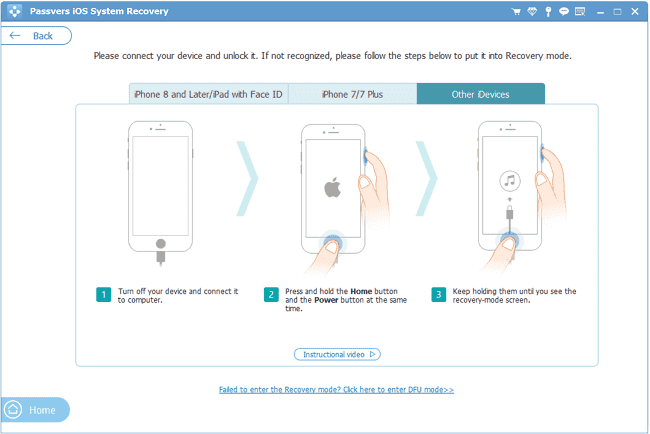
STEP 4. When Passvers detects that your iPhone is in Recovery Mode, confirm the device info.
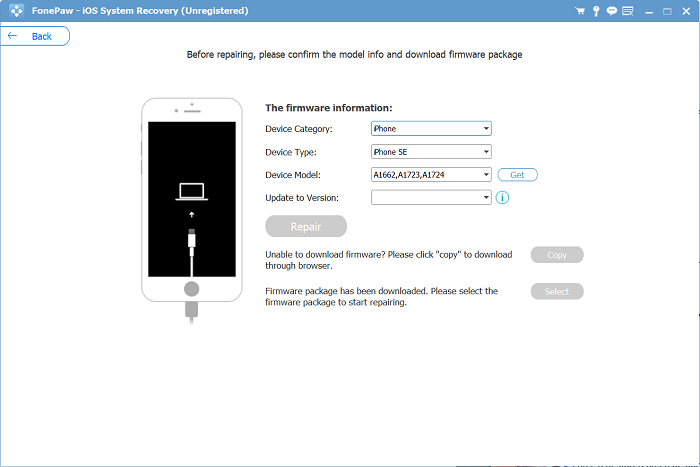
STEP 5. Click "Repair" and download the firmware to repair. Finally, click "Next" and wait until it's done.
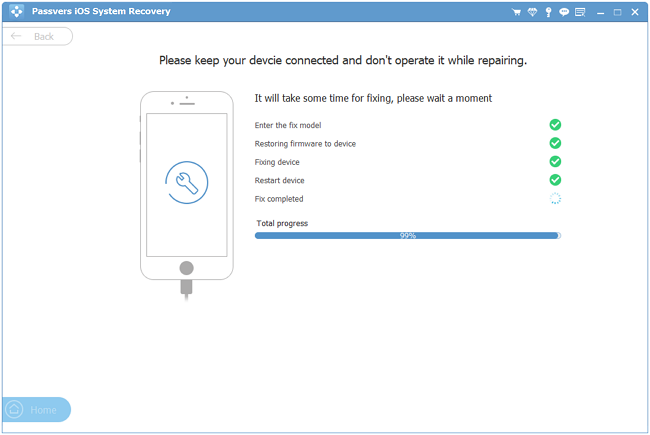
🎨 NOTE:
If you choose "Advanced Mode" to fix the iPhone/iPad update requested stuck error, your device data will be erased with the newest system installed. So make sure you have backed up your iPhone/iPad before you select this mode.
Bonus Tip: How to Stop an Update on iPhone/iPad
To avoid your iPhone stuck on update requested screen, you may consider turning it off. Then you can manually update your iPhone to the latest iOS when necessary. Let's see how to stop update on iPhone/iPad step by step.
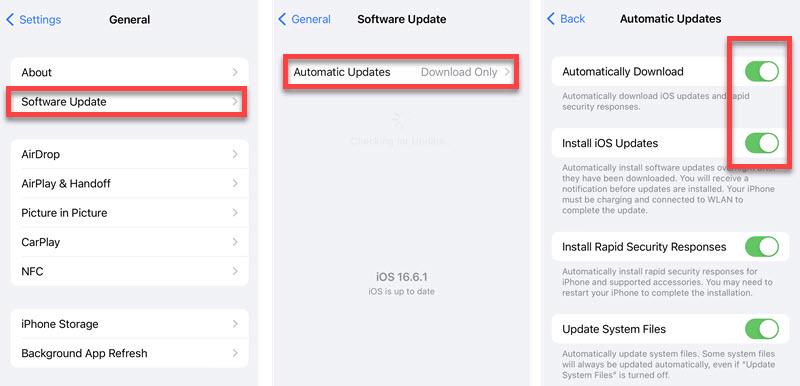
STEP 1. Open the "Settings" app on iPhone/iPad.
STEP 2. Tap "General" > "Software Update".
STEP 3. Select "Automatic Updates".
STEP 4. Toggle off "Automatically Download" and "Install iOS Updates"
FAQs About iPhone/iPad Update Requested
How long does iPhone update requested take?
It depends. If your iPhone stuck on update requested due to network fluctuations, it may take only a few minutes. However, if the issue is caused by server overload, the wait could extend to longer. In such cases, it's advisable to be patient and wait for Apple to resolve the problem on their end. Once the server-related issue is fixed, you can proceed to update your update requested iPhone.
How much space does iOS 17 update take up?
That may depend on your current iOS version and iPhone models. Small upgrade like from iOS 16.3.1 to iOS 16.4 requires 1.8GB in size while big upgrade between iOS 15 and iOS 16 would take up around 5GB. Therefore, if you're upgrading from the latest iOS 16 to iOS 17, your iPhone should have more than 5GB of free storage.
Conclusion
The 6 solutions above come to help you bypass iPhone stuck on update requested. You can start with easy workarounds like force restart, storage optimization, network check, update software deletion, or iPhone resetting. If you want to ensure a 100% success rate at fixing the iPhone stuck on update requested issue, then you cannot miss Passvers iOS System Recovery. Just follow the instructions. It's easy to repair the update requested iPhone on your own at home.