Quick Navigation
iTunes is equipped with the device restoring functionality, which can be pretty effective to deal with a variety of iOS problems. However, sometimes you may fail to connect the disabled/locked iPhone to iTunes and see an alert that says "iTunes could not connect to this iPhone/iPad. The value is missing", especially when your devices are disabled or locked up.
Don't worry when you meet such a problem as it can be easy to figure out! The following parts will introduce 4 easy tricks to solve the iTunes failing to connect to iPhone/iPad error without hassle. Now, grasp any of them to try making iTunes work for your devices once again.
You May Need:
#1. Fix 'value is missing' with Passvers iOS System Recovery (100% Working)
If you feel aimless to get started or just want a one-shot solution to replace iTunes without worrying about the iTunes could not connect to iPhone/iPad error, Passvers iOS System Recovery can be the best alternative to consider.
Passvers iOS System Recovery is an expert working to deal with 50+ of iOS system errors for you with ease, no matter if your devices are disabled, locked, frozen or under other in-normal conditions. With 3 recovering modes to select, it can be easy for you to pick up the way to deal with the system errors in a free, quick, and high-success rate. For the latest iOS 17 system, Passvers iOS System Recovery can also smoothly support. Hence, to deal with the disabled/locked iPhone failing to connect to iTunes, or directly process restore iPhone without iTunes, this software can absolutely be an ideal choice.
⭐Features of Passvers iOS System Recovery
- Working to deal with 50+ system errors
- Compatible with all iOS device models under different conditions
- 3 recovering modes to ensure quick and high-success recovering process
- Unnecessary to install iTunes to recover system
- 100% secure in-app performance
Next, also go through the brief guide to grasp the way using Passvers iOS System Recovery to deal with device recovery without iTunes to prevent failure of iTunes could not connect to this iPhone:
Step 1: Install and Launch Passvers iOS System Recovery
Download Passvers iOS System Recovery to your computer and install it.
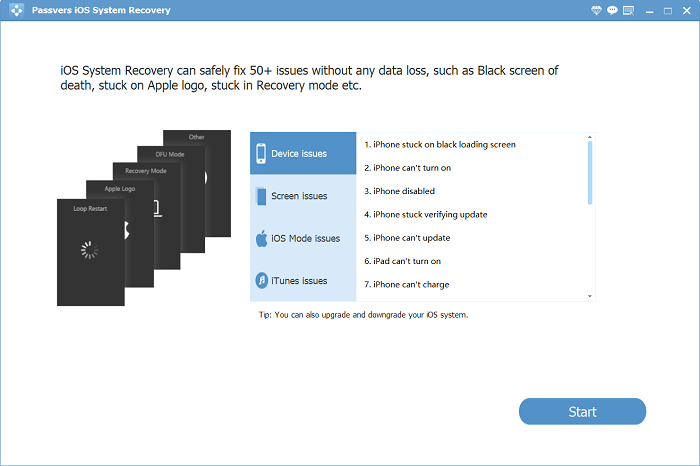
Then launch Passvers iOS System Recovery, click iOS System Recovery to move to the interface below. Click Start.
Step 2. Select A Mode to Recover
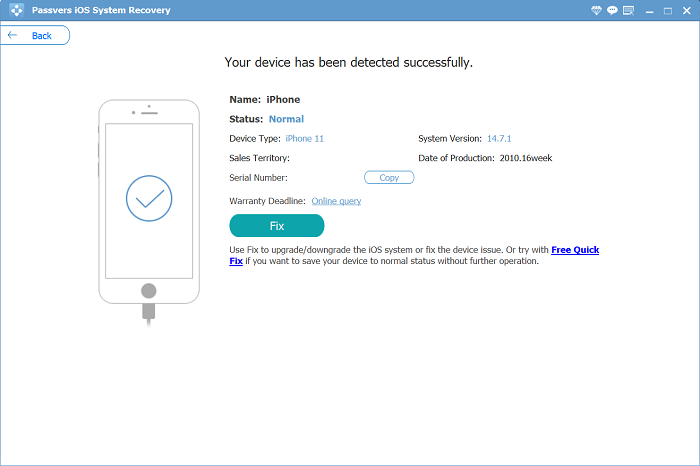
Use a USB cable to connect your iPhone with the computer. Then in the software, confirm a recovering mode and start scanning your device. Pay attention that the conditions of your data will be different while selecting different mode:
Free Quick Fix /Standard Mode: data will all be kept
Advanced Mode: data erasing will happen
Tips:
If you are trying to connect a disabled iPhone/iPad to iOS System Recovery, the software will detect that the connected device is abnormal and guide you to enter the Recovery mode/DFU mode.
Step 3: Install Firmware Package
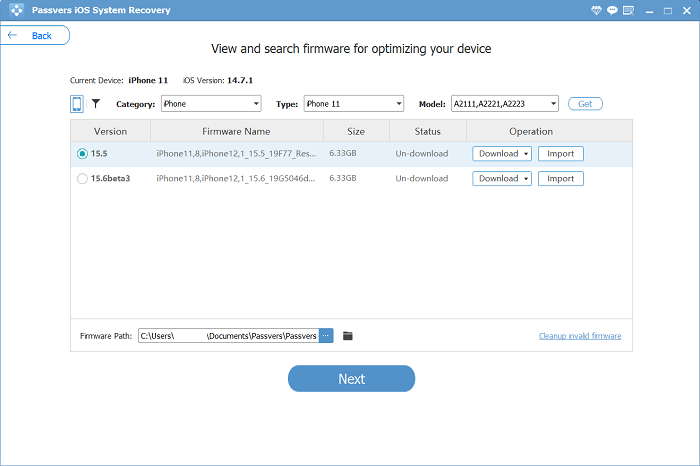
After successfully connecting both devices, the phone model and iOS version of your device will be displayed. Make sure the information of your iOS device is correct and click Fix to download the corresponding firmware package.
Step 4: Recover/Restore iPhone Without iTunes
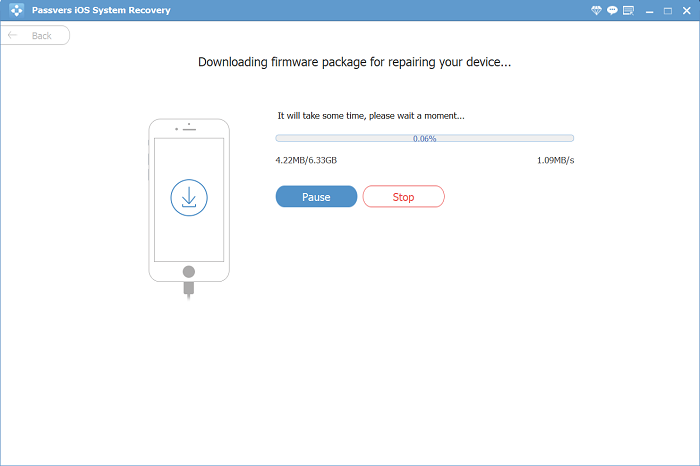
You may also provide options to choose. After the firmware package is downloaded, Passvers iOS System Recovery will start repairing your device with a high success rate guaranteed. Do not disconnect your phone and make sure the internet connection is working.
#2. Update iTunes to the Latest Version
When you are using iTunes of outdated versions, sudden errors like iTunes failing to connect this iPhone will probably occur. Hence, trying updating your iTunes to the latest version can definitely help fix the problem. Here's how to update iTunes on Windows and Mac:
On Windows
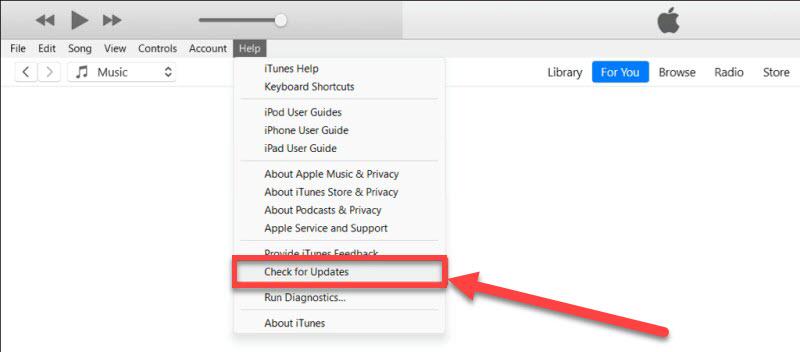
Step 1: Open iTunes and hit "Help" on the menu bar.
Step 2: Select "Check for Update" and iTunes will automatically install its latest version to replace the old one for you.
On Mac
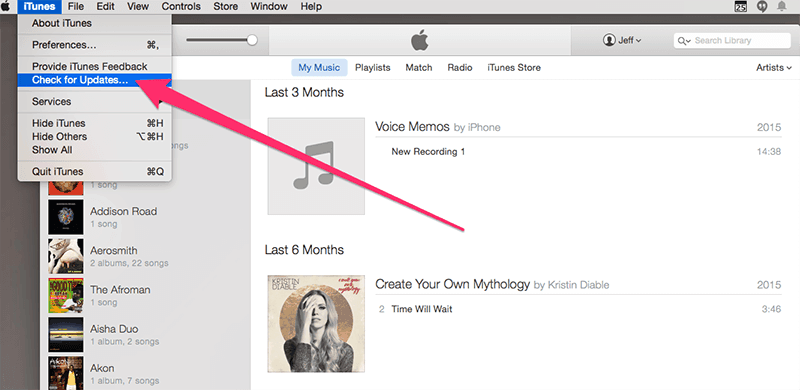
Step 1: Launch iTunes.
Step 2: Tap the iTunes icon on the upper-left of the desktop screen.
Step 3: Submit the version update by clicking the Check for Update button.
Despite processing iTunes update within the software, you are also available to go to the Microsoft App Store or Apple App Store to find iTunes and update it to the latest version.
#3. Reinstall iTunes on Computer
If your problem is still unsolved by simply updating iTunes to the latest version, maybe you should consider reinstalling iTunes. Before reinstalling iTunes, make sure to uninstall iTunes and all its related components. Then navigate to iTunes website or directly find it from the app store.
After you reinstall iTunes, try the recovery mode or DFU mode tricks again and see if the "iTunes could not connect to this iPhone/iPad. The value is missing" error is gone now.
#4. Put iPhone into Recovery Mode
Although it warns that "iTunes could not connect to this iPhone/iPad. The value is missing", you can still bypass this error notification and use iTunes to restore your disabled iPhone/iPad/iPod Touch by putting your device in recovery mode. The recovery mode enables iTunes to an iOS device that is not functioning properly. The following guide will show you how:
Step 1: Connect your iPhone/iPad/iPod Touch to your PC and run iTunes on your PC.
Step 2: Set your iPhone/iPad to recovery mode. Pay attention to that on different iOS device models, the buttons you need to press to put them in to recovery mode can be slightly different.
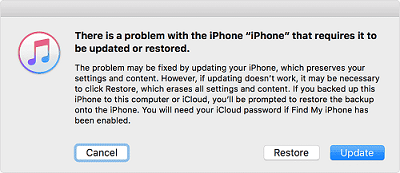
Step 3: After the iTunes logo appears on your device, you'll see the following dialog on iTunes. Click the Restore button in the dialog box on PC and confirm your choice when you are asked again.
Step 4: Wait for iTunes to process the restoration.
Note:
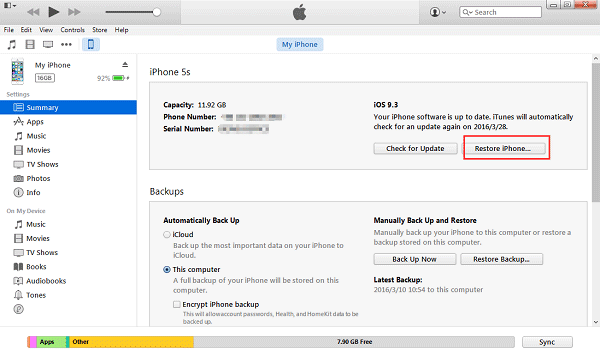
Some users reported that nothing happens after they click the Restore button in the dialog box. If this happens to you, click Cancel button instead, which will close the dialog box and return to the main window of iTunes. Now click the Restore option on the main window.
Bonus: Back Up & Transfer Data Between iPhone/iPad and Computer
If you only need to use iTunes to back up or transfer data, switching to a more professional alternative can help get rid of the iTunes could not connect to this iPhone/iPad error, and also ensures you an efficient process on data preservation. This helpful software can be FonePaw iOS Transfer.
FonePaw iOS Transfer performs with friendly and efficient functions to help you manage, back up, and transfer iOS data on Windows and Mac without hassle. It is compatible with almost all iOS file types, leaving no piece of data leaving behind while you use the software to process data transfer. With FonePaw iOS Transfer you no longer need to use iTunes, helping you to get rid of all kinds of sudden iTunes errors that would probably occur like the device connection failure.
Here also shows you how to transfer data between iOS devices on desktops via FonePaw iOS Transfer with ease:
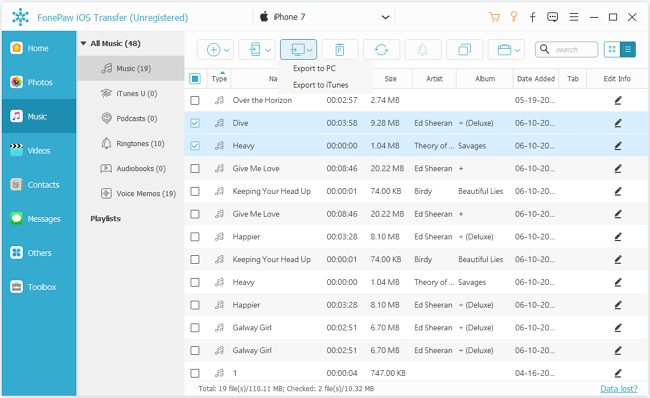
Step 1: Connect your iPhone/iPad with computer. Then, launch FonePaw iOS Transfer to enable the software to detect your device.
Step 2: Use the left navigation bar to reach the files or data you desire to transfer or back up, such as photos, music, contacts, messages, and so on. Then you are able to select the detailed items from the right panel.
Step 3: Once the selection completes, tap the "Export to" icon and then select the output device such as your PC to transfer the select files. FonePaw iOS Transfer will complete the process with quite a quick speed for you.
Conclusion
Don’t worry when you run into the iTunes could not connect to this iPhone/iPad issue, as there are multiple helpful ways available to help. You are also able to select using an iTunes alternative, the powerful software, Passvers iOS System Recovery to recover, restore, or deal with different iOS system errors at a pretty high success rate. Now, freely install the software and get ready to fix your problems!