Quick Navigation
For security protection, after entering the wrong password six times in a row, iPod Touch will be temporarily locked for a period of time, and more incorrect attempts will lead to the device being completely disabled, displaying the message "iPod is disabled. Connect to iTunes." But what if you, like the questioner, cannot connect to iTunes? Are there other ways to solve this problem?
Of course, there are! This article will introduce five effective methods to help you get rid of iPod disabled mode and restore your device to normal use. Whether you are a beginner or an experienced user, you will find a suitable method to get your iPod out of disabled mode.
1. Remotely Erase iPod Using iCloud (WiFi Connected)
The first effective method, and also the simplest and most common one to fix the "iPod is disabled. Connect to iTunes" error, is to use iCloud to remotely erase your iPod.
Through iCloud's "Find My" feature, you can remotely erase your iPod, which will delete all data and settings on the device, including the lock screen password, so you to reset the device and enter it again. However, there are two important prerequisites for using iCloud remote erase: make sure that the "Find My" function has been turned on, or you can't use this way to unlock a disabled iPod. Additionally, your iPod must be connected to WiFi. Without a network connection, the remote erase operation will not be possible.
Note:
To check if the iPod is connected to the internet, look at the top left corner of the lock screen. If it is connected, the WiFi icon will be displayed there. If it is not connected, it is recommended to proceed directly to Method 2.
Step 1. On an iPhone/iPad or other iOS device with internet access, open a browser and navigate to iCloud.
Step 2. Sign in with your Apple ID.
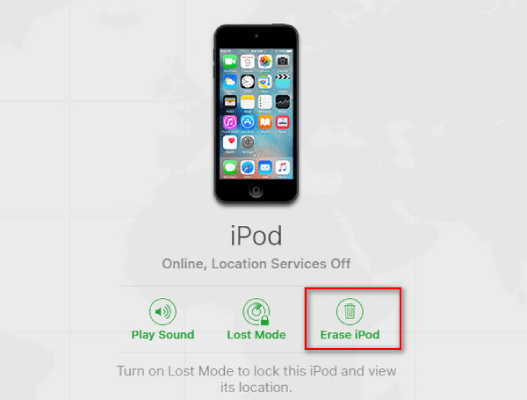
Step 3. Click All Devices and select the disabled iPod device (you want to erase and unlock.
Step 4. Choose Erase iPod. Then the device will erase all data, including the screen lock immediately. After that, you are allowed to access the iPod without a passcode or lock ID again.
2. Fix the iPod Unavailable Error Without iTunes (2 Simple Ways)
If your iPod cannot connect to the internet or iTunes cannot recognize your iPod, it's almost impossible to unlock through conventional methods, then using professional tools to solve the "iPod is disabled. Connect to iTunes" problem is definetly the best alternative. These tools are specifically designed to address iOS device issues and can directly fix the disabled iPod error without the need for iTunes. In this section, we'd like to offer you two alternatives to fix a disabled iPod.
Unlock Disabled iPod with Passvers iPhone Unlocker
The first professional tool is Passvers iPhone Unlocker, a powerful iOS device lock removal tool. It supports all iPod touch models and provides powerful services to help you bypass the screen locks of the devices to unlock disabled iPods once again. It can erase 4-digit/6-digit passcodes, Face ID, and Touch ID without passwords when they are not working to unlock the devices and lead to an iPod being unavailable.
With this tool, you don't need to worry about whether your iPod is connected to the network, as it can efficiently unlock devices in both scenarios. However, just like other iPod unlocking methods using iTunes, Passvers iPhone Unlocker will erase all data, so it is recommended to back up data before fixing the iPod disabled error.
Passvers iPhone Unlocker: Unlock iPod Touch Models At Once
- Wipe screen passcode in any scenario.
- Remove screen passcode of all types.
- Unlock disabled iPod Touch without the need for iTunes.
- User-friendly interface and simple operation steps, without needing professional technical knowledge.
- Get iPod Touch out of disabled mode in a few minutes.
Now, let's take a look at how to use Passvers iPhone Unlocker to fix the "iPod is disabled, connect to iTunes" problem.
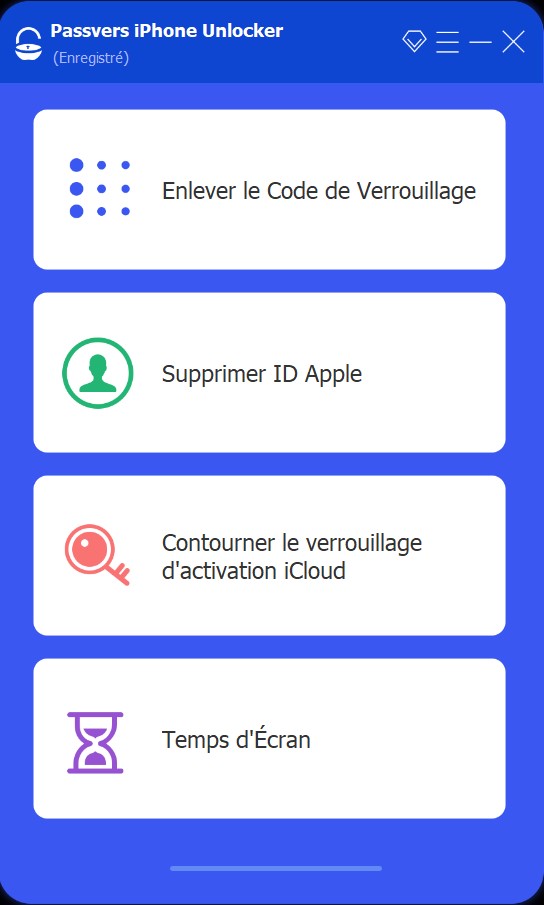
Step 1. Download and install the software. Upon entering the homepage, select the Wipe Passcode option at the top and click Start.
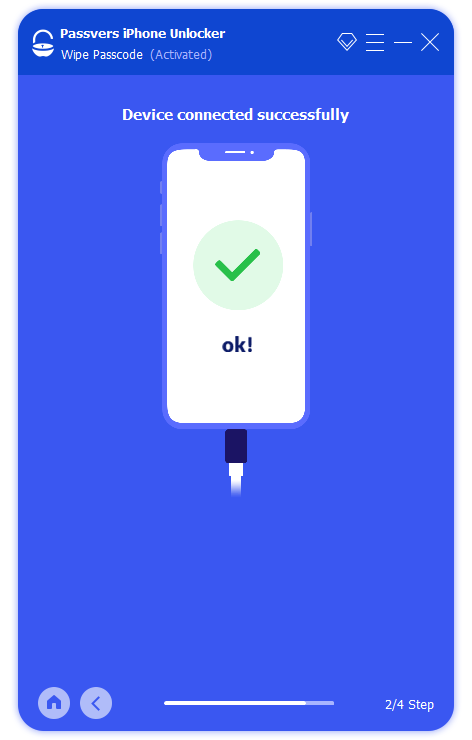
Step 2. Connect your iPod to the computer via USB cable and Passvers iPhone Unlocker will detect your device automatically
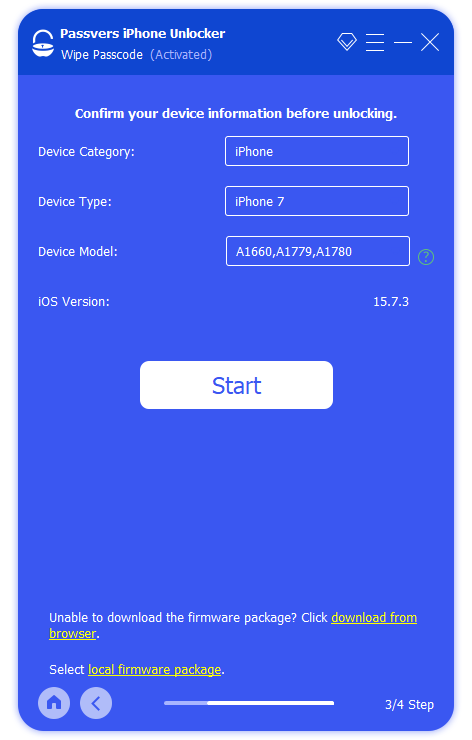
Step 3. Verify that the device information on the screen matches your iPod. When you are sure everything is right, click Start and the program will start downloading the firmware package for your device.

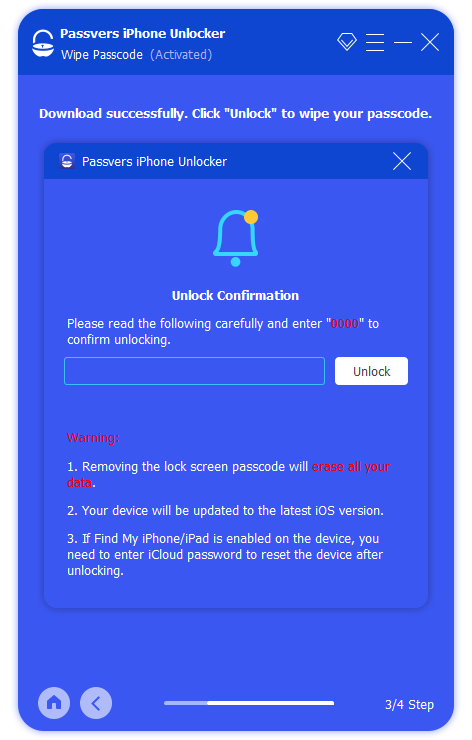
Step 4. When the firmware package is downloaded, a prompt will inform you to enter 0000 to confirm the iPod unlocking. Click Unlock to confirm and it will begin the unlocking.
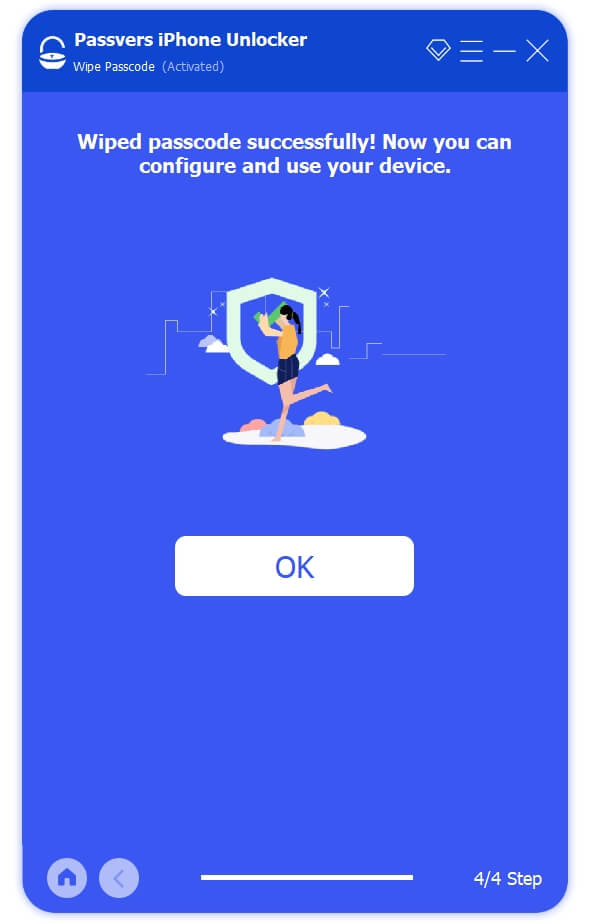
Step 5. Wait for the progress bar on the screen to reach 100%. Once completed, the unlocking process is finished. Click OK, and you can get into the disabled iPod again without a passcode.
Important:
When you are using Passvers iPhone Unlocker to wipe the screen passcode and unlock the disabled iPod, there are four things you must keep in mind:
- Removing the screen passcode will erase all data and settings on your iPod Touch. Thus, make sure you have backed up the important data before.
- It would be better to disable Find My iPod Touch in advance. If not, you will need to enter the iCloud passcode to reset the device after unlocking.
- Your device will be updated to the latest iOS version.
- You need to register before unlocking.
Unlock Disabled iPod with Passvers iOS System Recovery
Unlike Passvers iPhone Unlocker, Passvers iOS System Recovery works in another way to unlock disabled iPod by erasing all data, including the screen locks of the devices to help you get into them again. Except for the disabled situation, when you have got a dead, damaged, bricked or frozen iPod, the software can remove all data on it and bring you an unlocked device once again.
Advantages of using Passvers iOS System Recovery:
- The program won't ask you for passcode while iTunes does sometimes.
- It can fix disabled iPod Touch in recovery mode or DFU mode, under which all iOS devices can be restored from any state.
- It provides a step-to-step guide through the whole repair process.
Now, you can fix the "iPod is disabled, connect to iTunes" error by using Passvers iOS System Recovery with the tutorial below.
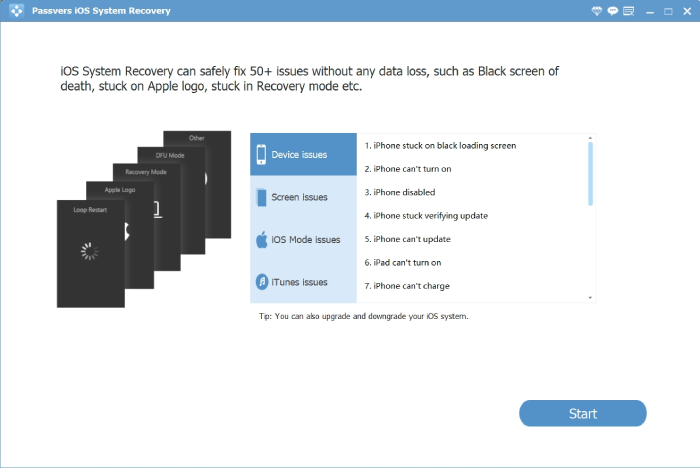
Step 1. Open Passvers iOS System Recovery and plug the disabled iPod into the computer. In the software, click Start to scan the device.
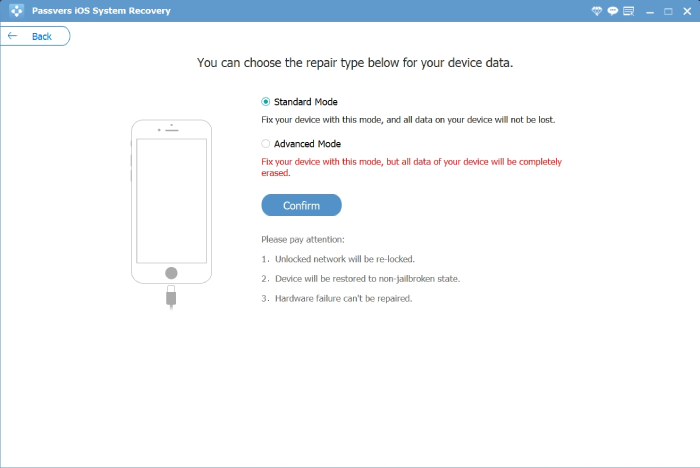
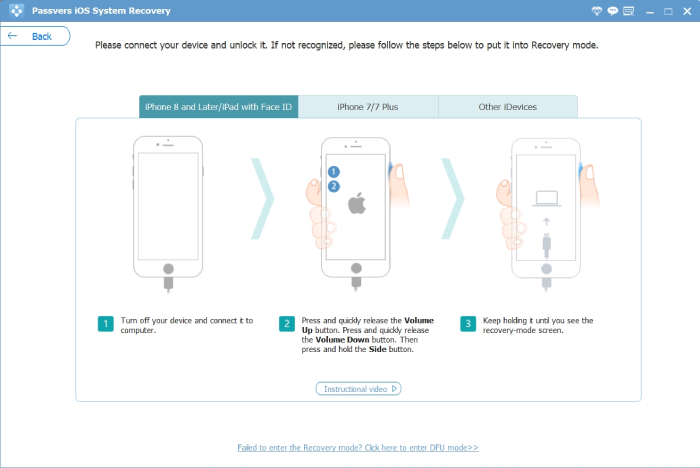
Step 2. Select Advanced Mode and click Confirm to continue. Now, also follow the guide on the program and put your iPod Touch in Recovery mode or DFU mode.
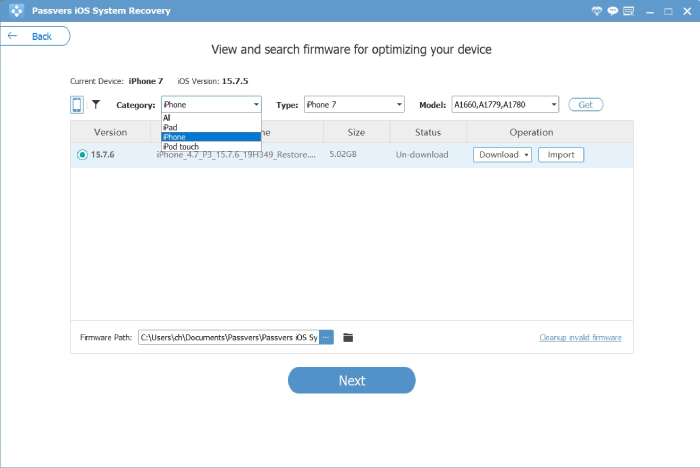
Step 3. When your iPod is detected successfully, the program will then display the information of your device, such as the serial number and system version. It is important for you to make sure the device info is correct.
After that, you can proceed to choose the detected iPod device from the category menu. Select a suitable firmware package from a different drop-down menu to download or import and hence repair the disabled iPod.
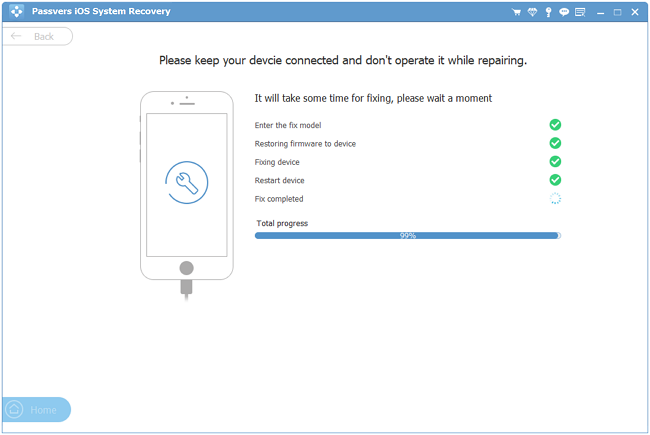
Step 4. Finally, click Repair if you have verified the info. Then Passvers iOS System Recovery will erase all data and recover the disabled iPod for you. Once it finishes, you can get an unlocked iPod to use again.
Note
All data will be erased after the repair. If you have a backup, you can restore the iTunes/iCloud backup when setting up the iPod later.
3. Fix the iPod Disabled Error with iTunes (2 Detailed Ways)
To deal with the "iPod is disabled, connect to iTunes" error, iTunes remains the most traditional method officially provided. Whether or not you have previously followed the instructions to use iTunes, you can now try following our correct steps to unlock your disabled iPod using iTunes. Based on whether you have once synced iPod with iTunes, there are two ways provided to help you restore iPod again.
Reset Disabled iPod with iTunes
If you have synced your iPod device to iTunes, the most direct way to unlock the disabled iPod is to reset the iPod via iTunes or Finder. In this way, all data on your iPod, including its passcode, will be erased. But you can make a backup beforehand so that you won't lose data after the restore.
If you don’t use iTunes frequently, you may not know the exact steps of how to reset an iPod that is disabled with iTunes. Now, follow the steps and learn how to unlock iPod with iTunes by using the restore feature and fix the "iPod is disabled, connect to iTunes" problem.
Step 1. Connect your iPod Touch to the computer that you synced with.
Step 2. Launch iTunes and let iTunes sync your iPod and make a backup.
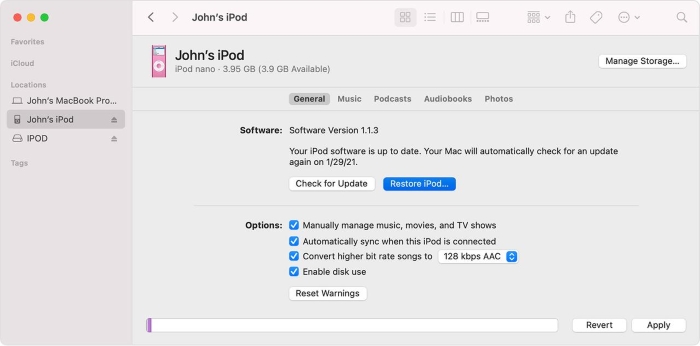
Step 3. Once the backup is done, click Restore in Summary Panel.
Step 4. When the restoring reaches the Set Up screen, choose Restore from iTunes backup and select the backup that you just made.
Reset Disabled iPod via Recovery Mode
However, if this is the first time that you sync your iPod with iTunes and it keeps asking for a passcode to unlock the disabled iPod, you would turn to another method to fix iPod disabled error - to use the recovery mode. You will still need help from iTunes to recover iPod and unlock the device when iPod is disabled mistakenly. Follow the steps to do it correctly.
Step 1. Press and hold the Top button until the power off slider appears. Drag the slider to turn off your iPod touch.
Step 2. Run iTunes on your computer. Then, press and hold the Home (iPod 6th generation or earlier) / Volume down (iPod of 7th generation) buttons and connect the disabled iPod to your computer at the same time. Keep holding the button until you see the recovery mode screen on your iPod.
Step 3. When iTunes pops up a notification for you to update or restore your device, continue doing the recovering process
Step 4. Now, choose Restore and iTunes will reinstall the software on your iPod Touch. All data will be gone after the iPod is enabled, so you are recommended to back up data in advance to avoid losing important information.
FAQs of Disabled iPod Errors
Why won't my iPod connect to iTunes?
There are several reasons why your iPod may not be connected to iTunes, including but not limited to:
- Outdated iTunes version.
- USB connection issues (e.g., damaged USB cable or USB port).
- Your device does not trust the current computer.
- The device is disabled and requires the password to be entered on the iPod.
- Software conflicts or security settings block the connection.
What to do when iTunes doesn't recognize iPod?
Considering the various reasons that can cause iTunes to not recognize your iPod, you can try the following steps:
- Update iTunes to the latest version and try reconnecting.
- Change the USB cable or use a different USB port on your computer to reconnect. If possible, try connecting your iPod to another computer to see if it is recognized.
- Trust your computer.
- If your iPod is disabled, put it into Recovery Mode and then try connecting it to iTunes.
- Use professional tools like Passvers iPhone Unlocker.
Get iPod Out of Disabled Mode!
To fix the "iPod is disabled, connect to iTunes" error, iTunes is one of the common methods, but it requires that your iPod has been recognized by iTunes before. If it has not been recognized, you need to put your iPod into Recovery Mode, which may also encounter various errors. Using iCloud for remote erase is another option, but it requires the iPod to be connected to the internet; otherwise, it won't work.
If your iPod is neither connected to the internet nor previously synced with iTunes, using a professional tool like Passvers iPhone Unlocker would be one of the best solutions. It can get your iPod out of disabled mode in a few simple steps without limitations. The methods introduced in this article are suitable for different situations. We hope that they will be helpful to you.